
Discover How to Can Grape Juice at Home
Have you ever wondered how to preserve the fresh, vibrant flavor of grapes long after the harvest season? Whether you’re drowning in a bountiful grape yield from your backyard vineyard or simply want to enjoy homemade grape juice year-round, canning is the answer. In this comprehensive guide, we’ll walk you through the step-by-step process of canning grape juice at home, revealing the secrets to capturing that perfect grape taste and ensuring your jars stay fresh for months to come.
Key Takeaways
- Learn the benefits of homemade grape juice and the best grape varieties to use for canning
- Discover the step-by-step process for making and canning grape juice at home
- Explore tips for adjusting sweetness and flavor to suit your personal taste preferences
- Understand the proper storage techniques to maximize the shelf life of your canned grape juice
- Gain confidence in the canning process to enjoy the fresh taste of grapes year-round
So, are you ready to unlock the secrets to creating delicious, homemade grape juice that you can enjoy for months to come? Let’s dive in and discover how to can grape juice at home!
The Basics of Canning Grape Juice
Making your own grape juice at home offers numerous benefits. Homemade grape juice is free from preservatives, artificial sweeteners, and other additives found in store-bought varieties. It allows you to control the sweetness level and preserve the fresh, vibrant flavor of the grapes. When choosing grape varieties for canning, consider options like Concord, Niagara, Catawba, and Muscadine grapes. Each type offers unique flavor profiles and characteristics that can be used to create delicious homemade grape juice.
Benefits of Homemade Grape Juice
- Free from preservatives, artificial sweeteners, and other additives
- Allows you to control the sweetness level
- Preserves the fresh, vibrant flavor of the grapes
Choosing the Right Grape Varieties
When selecting grapes for canning, consider the following varieties:
- Concord Grapes: Known for their bold, rich flavor and deep purple color.
- Niagara Grapes: Offer a sweet, fruity taste and a pale green appearance.
- Catawba Grapes: Feature a delicate balance of sweetness and acidity, with a reddish-purple hue.
- Muscadine Grapes: Possess a unique, musky flavor and a range of colors, including bronze, purple, and black.
Each of these grape varieties brings its own distinct characteristics to the canning process, allowing you to create a variety of homemade grape juice flavors.
“Homemade grape juice is a delightful way to capture the essence of the grape harvest and enjoy it year-round.”
Step-by-Step Guide to Making Grape Juice
Ingredients and Equipment
To make delicious grape juice at home, you’ll need a few simple ingredients and basic equipment. First, you’ll need fresh, ripe grapes. Concord grapes are a popular choice, as they have a deep, rich flavor. You’ll also need a small amount of water to help extract the juice.
As for equipment, you’ll need a saucepan or stockpot, a potato masher or similar tool for crushing the grapes, and a cheesecloth or jelly bag for straining the juice. A funnel and clean glass jars or bottles are also helpful for storing the finished juice.
Preparation Process
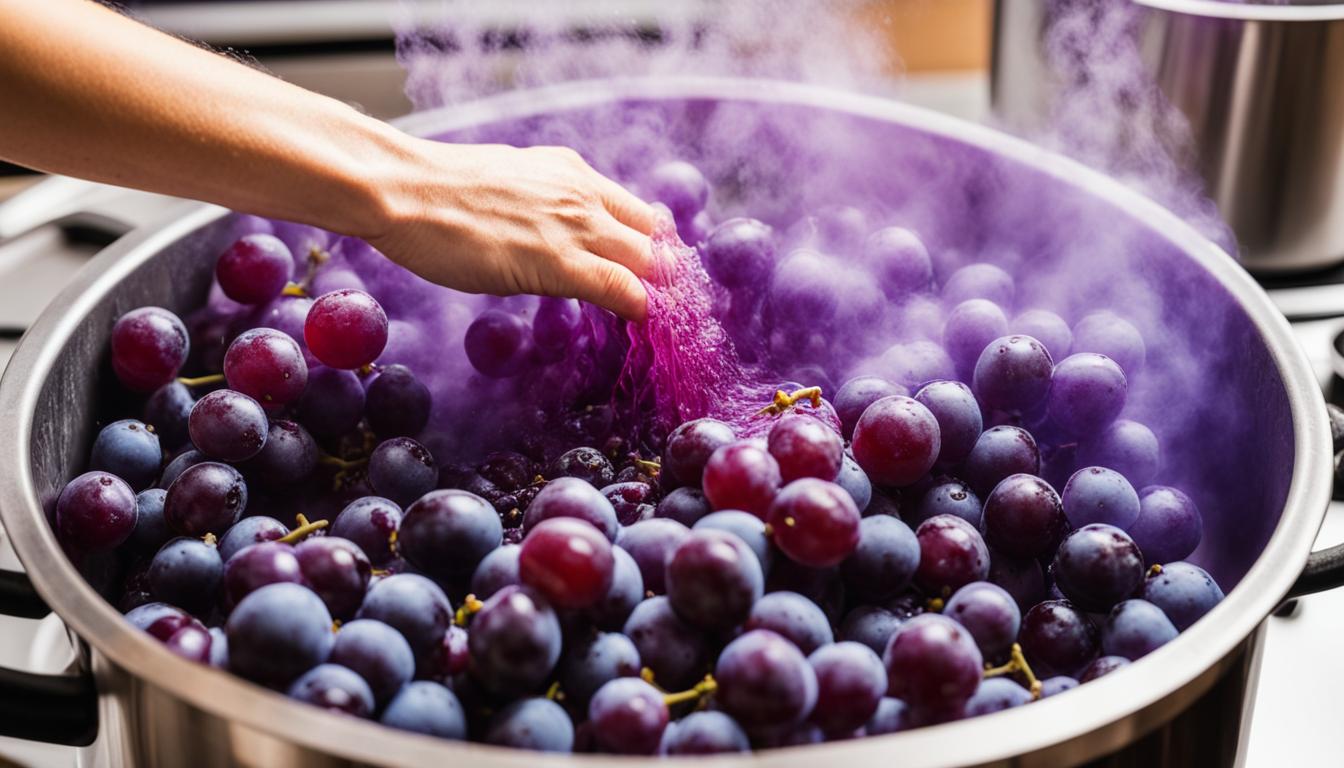
Start by washing the grapes thoroughly and removing any stems or damaged berries. Place the grapes in a saucepan and add just enough water to cover them. Bring the mixture to a simmer over medium heat, and let it cook for about 10-15 minutes, or until the skins are soft and the juices are released.
Once the grapes are cooked, use a potato masher or similar tool to gently crush them, releasing even more of the flavorful juice. Strain the grape mixture through a cheesecloth or jelly bag, pressing on the solids to extract as much juice as possible.
The extracted grape juice may still contain some sediment, so it’s best to refrigerate it for 24-48 hours to allow the sediment to settle to the bottom. Once the juice has settled, carefully pour or ladle the clear juice into clean glass jars or bottles, leaving a bit of headspace at the top.
Your homemade grape juice is now ready to enjoy! Store it in the refrigerator for up to a week, or follow the canning instructions in the next section to preserve it for longer-term storage.

“Homemade grape juice is a true delight – the sweet, tangy flavor is unbeatable, and it’s so satisfying to know exactly what’s going into your glass.”
how to can grape juice
Canning your own grape juice is a fantastic way to preserve the vibrant flavors of the harvest season. By following a simple water bath canning process, you can enjoy your homemade grape juice for up to 3-5 years. Let’s dive into the step-by-step guide to canning grape juice at home.
Preparing the Juice
The first step is to ensure you have fresh, ripe grapes. Roughly 3 1/2 pounds of grapes will yield 1 quart (2 pint jars) of juice. To get started, wash the grapes thoroughly and remove any stems or damaged berries. Then, use a juicer or steam juicer to extract the grape juice, being careful not to squeeze the pulp and skin, which can lead to cloudiness.
Once you have your freshly extracted grape juice, it’s essential to let it rest in the refrigerator for 24-48 hours. This allows any tartaric acid crystals to settle, ensuring a clear, vibrant juice.
Water Bath Canning
Now it’s time to can your grape juice. Start by heating the juice to 190°F. Carefully ladle the hot juice into clean, sterilized canning jars, leaving a 1/4-inch headspace at the top. Wipe the jar rims with a clean, damp cloth to remove any residue, and seal the jars using the two-piece canning lids.
- Place the filled jars in a water bath canner, ensuring they are fully submerged.
- Process the jars for 5 minutes (adjust time for higher altitudes).
- Carefully remove the jars from the canner and allow them to cool completely on a towel or wire rack.
- Once cooled, check that the lids have sealed properly by pressing down on the center of each lid. If the lid springs back, the seal has not been achieved, and the jar should be refrigerated and consumed within 3-5 days.
Properly sealed jars can be stored in a cool, dark place for up to 3-5 years, allowing you to enjoy the taste of summer all year round.
Remember, canning grape juice is a straightforward process that allows you to preserve the natural sweetness and vibrant color of your homegrown or locally sourced grapes. With a little preparation and attention to detail, you can create a delicious and shelf-stable grape juice that will be the envy of your friends and family.
Adjusting Sweetness and Flavors
Crafting the perfect homemade grape juice is all about striking the right balance between sweetness and flavor. After extracting the juice, the key is to taste it and determine if you’d like a sweeter profile. To sweeten your grape juice, gradually add a bit of sugar, honey, or your preferred sweetener, stirring until the desired level of sweetness is achieved.
Remember to start with a small amount and add more as needed to avoid overpowering the natural grape flavors. Approximately 1 quart (2-pint jars) of grape juice can be made from 3 ½ pounds of grapes, so the amount of sweetener required will depend on the quantity of juice you’re working with.
If you’re canning grape juice, the USDA has approved half-gallon jars for this process. Canning times vary based on altitude, with 5 minutes required for pint and quart jars below 1,000 feet, and 10 minutes for half-gallon jars.
Beyond sweetness, you can also explore ways to enhance the flavor of your grape juice. Consider adding a touch of lemon juice or a pinch of spices like cinnamon or allspice to complement the natural grape notes. Experiment with different flavor combinations to find your perfect homemade grape juice.

Remember, the key to creating the best-tasting grape juice is to start with high-quality grapes and then make adjustments to suit your personal preferences. With a little experimentation, you can craft a grape juice that’s both refreshing and perfectly tailored to your taste buds.
Storage and Shelf Life
Proper storage is essential to maximize the shelf life of your homemade grape juice. Whether you choose to refrigerate or can your grape juice, understanding the best storage techniques will ensure you can enjoy the delicious flavors for months or even years to come.
Refrigerating vs. Canning
If you plan to enjoy the grape juice fresh, you can simply store it in the refrigerator for 3-5 days. This is a great option for short-term storage and allows you to savor the juice’s vibrant flavors. However, for longer-term storage, canning the juice is the way to go. Properly canned and stored in a cool, dark place, homemade grape juice can last for 3-5 years.
Proper Storage Techniques
When canning grape juice, be sure to follow the proper sterilization and sealing procedures to ensure the best quality and food safety. This includes thoroughly cleaning and sterilizing all equipment, carefully filling the jars, and properly sealing the lids. Stored in a cool, dark place, your canned grape juice will maintain its freshness and flavor for years to come.
Refrigerated or canned, your homemade grape juice will be a delightful treat to enjoy year-round. With the right storage techniques, you can savor the taste of summer’s bounty long after the harvest has passed.
| Storage Method | Shelf Life | Key Considerations |
|---|---|---|
| Refrigerating | 3-5 days | Ideal for short-term storage and enjoying the fresh flavors |
| Canning | 3-5 years | Requires proper sterilization and sealing procedures for long-term storage |
| Commercially Canned | 2-5 years | Maintain best quality until the expiration code date on the can |
| Metal-Mylar® Pouches | 8-10 years | Provide an extended shelf life for home-canned foods |
“Properly canned and stored in a cool, dark place, homemade grape juice can last for 3-5 years.”
Conclusion
Canning grape juice at home is a rewarding and satisfying process that allows you to preserve the fresh, vibrant flavor of grapes for months or even years. By following the step-by-step instructions in this guide, you can easily make and can your own grape juice, enjoying the benefits of a homemade, preservative-free beverage. Whether you’re looking to preserve a bountiful grape harvest or simply want to enjoy the taste of fresh grape juice year-round, this guide has provided you with all the information you need to get started.
Homemade grape juice offers a wealth of nutritional benefits, from its high antioxidant content to its essential vitamins and minerals. The canning process helps to lock in these valuable nutrients, ensuring that you can savor the health-promoting properties of grape juice long after the harvest season has passed. Moreover, the ability to customize the sweetness and flavor of your homemade grape juice allows you to create a beverage that perfectly suits your taste preferences.
As you embark on your grape juice canning journey, remember to experiment with different grape varieties and fermentation techniques to discover your own unique flavor profiles. With a little practice and patience, you’ll be able to create a pantry full of delicious, shelf-stable grape juice that will delight your family and friends. So, why not give it a try and enjoy the satisfaction of preserving the taste of summer all year round?