DIY Guide: How to Cover Kitchen Tiles Effectively
Welcome to our comprehensive DIY guide on how to effectively cover kitchen tiles. If you’re looking to transform the look of your kitchen, covering the tiles is a great way to do it. Not only will it freshen up the space, but it can also add a touch of style and personalization to your kitchen.
In this section, we will explore various kitchen tile covering options and provide you with step-by-step instructions to help you achieve a stunning result. Whether you’re a seasoned DIY enthusiast or a beginner, this guide will equip you with the knowledge and techniques needed to successfully cover your kitchen tiles.
Key Takeaways:
- Learn how to cover kitchen tiles to transform the look of your kitchen.
- Discover various kitchen tile covering options to suit your style and budget.
- Follow step-by-step instructions for a successful DIY project.
- Add a touch of style and personalization to your kitchen with covered tiles.
- Achieve a stunning result with the right materials and techniques.
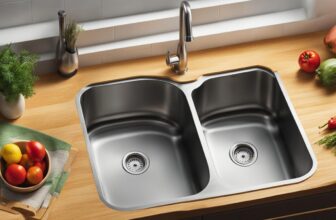
Assessing Your Kitchen Tiles
Before you begin covering your kitchen tiles, it’s essential to assess their condition. This step will help you determine whether your tiles are suitable for covering or if they require any repairs.
Here are some key areas to assess when evaluating the state of your kitchen tiles:
- Cracks: Inspect the tiles for any cracks or chips. These can affect the durability and overall appearance of your kitchen tiles.
- Loose Tiles: Check if any tiles are loose or coming off the surface. These tiles should be reattached or replaced to ensure a sturdy foundation for the new covering.
- Stains: Look for any stubborn stains or discoloration on the tiles. These can be indicators of underlying issues that might affect the effectiveness of the coverings.
- Grout Condition: Assess the condition of the grout between the tiles. Cracked or deteriorating grout should be repaired or replaced before covering the tiles.
- Uneven Surface: Check if the tiles have an even surface. Any unevenness can affect the application and appearance of the new covering.
If you find significant damage or issues with your kitchen tiles, it’s recommended to consult a professional before proceeding with the covering process. They can provide expert advice on the best course of action to ensure a successful outcome.
Remember, a thorough assessment of your kitchen tiles will help you plan and execute the covering process effectively, resulting in a beautifully transformed kitchen space.
Tip: Take pictures of the areas you need to address as part of the assessment. This will help you keep track of the improvements you make and serve as a useful reference throughout the covering process.
Removing Grout and Existing Tile Coverings
When it comes to covering your kitchen tiles effectively, it’s important to start with a clean slate. This means removing any existing grout or tile coverings that may be in place. By taking these necessary steps, you’ll ensure a smooth and even surface for your new kitchen tile covering. In this section, we will provide you with step-by-step instructions on how to remove grout and existing tile coverings, allowing you to prepare your kitchen tiles for the transformation ahead.
Step 1: Assessing the Situation
Before you begin the process of removing grout and tile coverings, it’s essential to examine the condition of your kitchen tiles. Inspect for any loose or damaged tiles, as well as the type of grout used. This initial assessment will inform your approach and determine the tools and techniques you’ll need to employ.
Step 2: Tools and Materials
To effectively remove grout and tile coverings, you’ll need the following tools and materials:
- A grout removal tool or a utility knife
- A hammer and chisel
- A putty knife
- A scraper
- Safety goggles and gloves
- A dust mask
Step 3: Removing Grout
Removing grout is the first step in the process. Here’s how to do it:
- Put on your safety goggles, gloves, and dust mask to protect yourself.
- Using a grout removal tool or a utility knife, carefully work the tool into the grout lines.
- Apply gentle pressure and scrape the tool along the grout lines, removing the old grout.
- Continue this process until all the grout has been removed.
If you encounter stubborn or hard-to-reach grout, you can use a hammer and chisel to remove it. However, be cautious not to damage the tiles in the process.
Step 4: Removing Tile Coverings
Once the grout has been removed, it’s time to remove any existing tile coverings. Follow these steps:
- Using a putty knife or scraper, carefully pry up the edges of the tile coverings.
- Apply slight pressure and gently lift away the tiles, one by one.
- Continue this process until all the existing tile coverings have been removed.
Be patient and take your time during the removal process to avoid damaging the underlying surface or neighboring tiles.
Now that you’ve successfully removed the grout and existing tile coverings, your kitchen tiles are ready to be covered with a fresh new look. In the next section, we will explore the various materials you can choose from to transform your kitchen tiles into a stunning focal point.
| Tools and Materials Needed: |
|---|
| Grout removal tool or utility knife |
| Hammer and chisel |
| Putty knife |
| Scraper |
| Safety goggles and gloves |
| Dust mask |
Choosing the Right Covering Materials
Selecting the right materials for covering kitchen tiles is crucial when it comes to achieving a successful transformation. In this section, we will discuss various kitchen tile covering materials and their pros and cons to help you make an informed decision.
Tiles
One popular option for covering kitchen tiles is to use new tiles. With a wide range of colors, patterns, and sizes available, tiles offer versatility and durability. Whether you prefer traditional ceramic tiles or modern porcelain tiles, there are options to suit every style and budget. Tiles are also relatively easy to clean and maintain, making them a practical choice for kitchens.
Peel and Stick Tiles
If you’re looking for a quick and budget-friendly option, peel and stick tiles are worth considering. These self-adhesive tiles are easy to install and require no special tools or skills. Peel and stick tiles come in a variety of styles and designs, allowing you to achieve the desired look without the hassle of traditional tile installation. However, it’s important to note that they may not offer the same level of durability as traditional tiles.
Vinyl Sheets
Vinyl sheets are another popular choice for covering kitchen tiles. They are available in a wide range of designs and colors, allowing you to create a customized look for your kitchen. Vinyl sheets are easy to install, clean, and maintain, making them a practical option for busy kitchens. Additionally, they offer good resistance to moisture and stains, enhancing their longevity.
Paint
Painting your kitchen tiles can be a cost-effective way to cover them and give your kitchen a fresh new look. There are specific tile paints available that are designed to adhere to tile surfaces. Before painting, ensure that the tiles are properly cleaned and prepped to ensure optimal adhesion. Keep in mind that painted tiles may require periodic touch-ups to maintain their appearance.

Wallpaper
Using wallpaper to cover kitchen tiles is a creative and versatile option. Wallpaper offers a wide range of patterns, textures, and colors, allowing you to achieve various design aesthetics. It’s important to choose a wallpaper that is heat and moisture resistant to ensure its longevity in the kitchen environment. Proper installation and sealing are essential to prevent peeling and ensure its durability.
Expert Tip: When choosing the right covering materials, consider factors such as durability, ease of installation, maintenance requirements, and overall aesthetic appeal. Be sure to match the material to your specific kitchen environment and personal style.
Preparing the Surface
Before applying a new covering to your kitchen tiles, it’s crucial to prepare the surface properly. This ensures that you achieve a clean and smooth result that will enhance the overall appearance of your kitchen.
Evaluating the Condition of Your Kitchen Tiles
Start by carefully examining your kitchen tiles to identify any damages or imperfections. Look for cracks, chipped areas, or loose tiles that may need repair or replacement. Assessing the condition of your tiles will help you determine the level of preparation required.
Removing Dirt and Grime
Next, thoroughly clean your kitchen tiles to remove any dirt, grease, or stains. Use a mild detergent and warm water solution to scrub the surface gently. For stubborn stains, you can try using a mixture of baking soda and water or a commercial tile cleaner. Be sure to rinse the tiles thoroughly after cleaning to remove any residue.
Repairing Damaged Tiles
If you come across any cracked, chipped, or loose tiles during the evaluation, it’s essential to address them before proceeding. Replace any damaged tiles and fix any loose ones using tile adhesive or mortar. Allow sufficient time for the repairs to dry and set before continuing with the preparation process.
Smoothing the Surface
To ensure a smooth and even surface, it may be necessary to fill in any gaps, dents, or uneven areas on the tiles. You can use a tile filler or putty to achieve a level surface. Follow the manufacturer’s instructions and allow the filler to dry completely before moving on to the next step.
Sanding the Tiles
If your kitchen tiles have a textured surface, you may need to sand them lightly to create a smooth base for the new covering. Use fine-grit sandpaper and sand in a circular motion until the tiles feel smooth to the touch. Remember to wipe away any dust or debris with a damp cloth after sanding.
Applying a Primer
Finally, apply a suitable primer to the surface of your kitchen tiles. A primer helps improve the adhesion of the new covering and enhances its durability. Choose a primer specifically designed for tile surfaces and follow the manufacturer’s instructions for application and drying times.
By following these steps to prepare the surface of your kitchen tiles, you’ll ensure that the new covering adheres smoothly and creates a stunning transformation. Now that your tiles are ready, you can move on to the next section: Applying the New Covering.
Applying the New Covering
With your kitchen tiles prepped and ready, it’s time to breathe new life into your space by applying the new covering. In this section, we will explore a variety of kitchen tile renovation ideas to inspire your creativity and guide you through the steps of successfully transforming your kitchen.
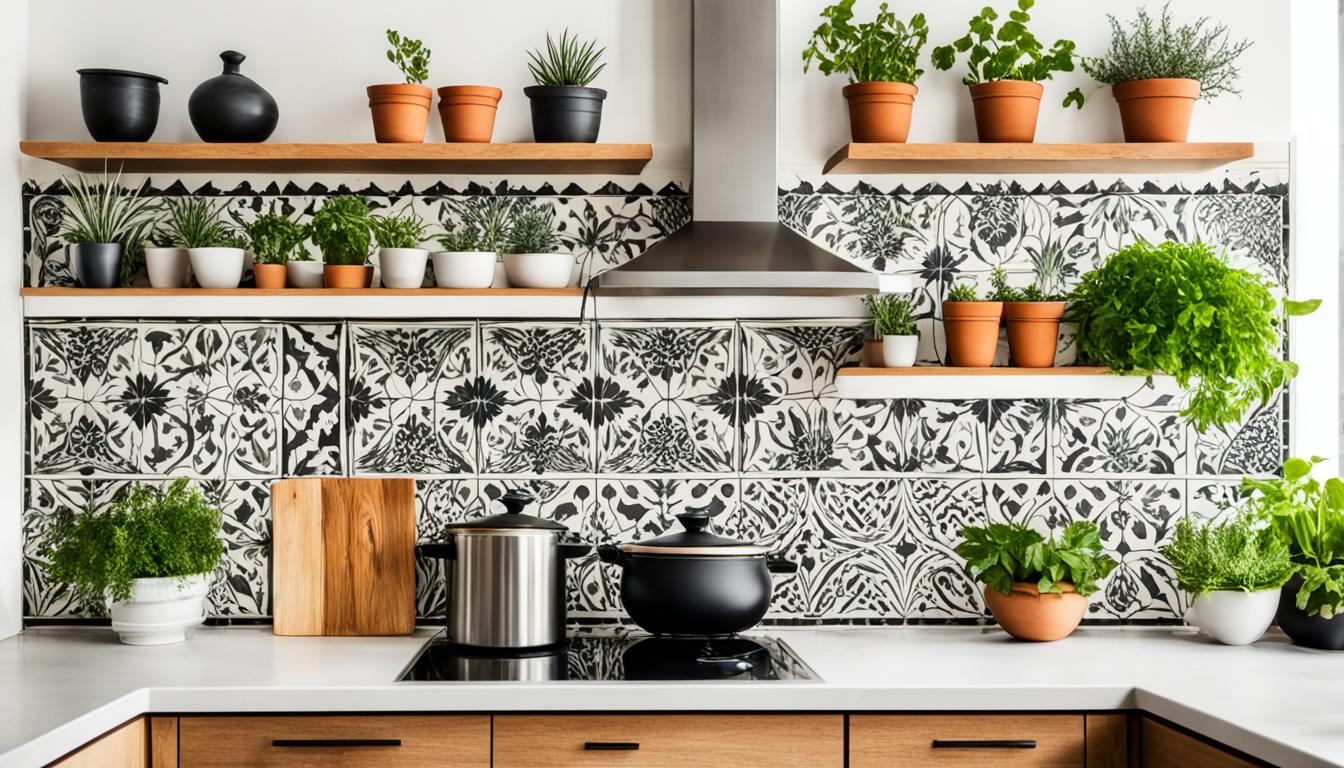
Kitchen Tile Renovation Ideas
If you’re looking for fresh ideas to revamp your kitchen tiles, consider the following:
- Painting: A cost-effective and versatile option, painting your tiles allows you to achieve a custom look that perfectly matches your style. From bold colors to soothing neutrals, the possibilities are endless. Ensure you choose a paint that is suitable for tile surfaces and apply multiple coats for durability.
- Peel-and-Stick Tiles: Easily transform the look of your tiles with peel-and-stick tile covers. These adhesive-backed tiles come in various styles, patterns, and colors, offering a hassle-free way to update your kitchen in no time.
- Mosaic Designs: Create a stunning visual impact by incorporating mosaic designs into your kitchen tiles. From classic patterns to contemporary motifs, mosaic tiles can add depth, texture, and character to your space.
- Tiled Backsplash: If you want to focus on a specific area of your kitchen, consider adding a tiled backsplash. Choose stylish tiles that complement your overall kitchen aesthetic, and enjoy the added functionality and visual appeal.
Remember that your kitchen tile renovation ideas should cater to your personal preferences and style. Let your creativity shine through as you envision the perfect look for your updated kitchen.
Steps to Successfully Apply the New Covering
Once you’ve settled on an idea for your kitchen tile renovation, follow these steps to ensure a successful application:
- Clean the Surface: Thoroughly clean the existing tiles to remove any dirt, grease, or grime. Use a mild cleaning solution and a sponge or rag to achieve a clean and smooth surface.
- Prepare the Area: Protect the surrounding areas of your kitchen by covering countertops, cabinets, and appliances with drop cloths or plastic sheets. This will prevent any accidental damage during the application process.
- Apply Primer: If necessary, apply a primer to improve the adhesion of the new covering. Check the instructions provided with the chosen covering material for specific primer recommendations.
- Follow Application Instructions: Depending on the chosen kitchen tile covering material, carefully follow the manufacturer’s instructions for application. Whether it’s adhesive-backed tiles, paint, or other materials, ensure you apply them correctly to achieve the desired result.
- Allow Proper Drying Time: Give the new covering adequate time to dry and cure according to the manufacturer’s guidelines. Rushing this step may lead to premature damage or poor adhesion.
- Inspect and Enjoy: Once the covering has fully dried, inspect the area for any imperfections or touch-ups that may be required. Stand back and admire your newly transformed kitchen space!
Remember, the process of applying the new covering requires patience and attention to detail. Take your time, follow the instructions, and enjoy the rewarding experience of giving your kitchen a fresh and stylish update.

Affordable and Creative Kitchen Tile Upgrades
If you’re looking to give your kitchen a fresh new look without breaking the bank, we’ve got you covered! In this section, we will explore affordable and creative kitchen tile upgrades that will transform the heart of your home. From budget-friendly solutions to innovative ideas, you’ll find plenty of inspiration to revitalize your kitchen tiles.
1. Paint It Up
One of the most affordable ways to upgrade your kitchen tiles is by giving them a fresh coat of paint. Choose a high-quality tile paint that is specifically formulated for kitchen surfaces. With a variety of colors and finishes to choose from, you can easily create a stylish and personalized look.
Pro Tip: Before painting, make sure to clean and prime the tiles to ensure proper adhesion.
2. Peel and Stick Tiles
If you want a quick and easy solution, consider using peel and stick tiles. These self-adhesive tiles come in a range of designs, patterns, and sizes, making it easy to achieve a modern and trendy look. Simply peel off the backing and stick them onto your existing tiles for an instant transformation.
3. Tile Stickers
Add a touch of creativity to your kitchen tiles with decorative tile stickers. These adhesive decals are available in various designs, including intricate patterns, floral motifs, and geometric shapes. They are easy to apply and remove, allowing you to change up the look whenever you want.
4. Mosaic Magic
Get creative with mosaic tiles to add a unique and eye-catching element to your kitchen. Mix and match different colors and shapes to create a one-of-a-kind backsplash or accent wall. Mosaic tiles are not only affordable but also offer endless design possibilities.
5. Tile Overlays
If you’re looking for a budget-friendly solution that doesn’t involve removing your existing tiles, consider using tile overlays. These thin tiles can be easily glued onto your current tiles, effectively covering up any outdated or worn-out patterns. They are available in a range of colors and designs, allowing you to achieve a fresh and modern look.
| Pros | Cons |
|---|---|
| Cost-effective | Limited design options |
| Easy to install | May not last as long as traditional tiles |
| No need for tile removal | Requires a smooth and even surface for proper installation |
With these affordable and creative kitchen tile upgrades, you can give your kitchen a fresh new look without breaking the bank. Whether you choose to paint, use peel and stick tiles, or explore other options, you’ll be amazed at the transformation these simple changes can bring. Get ready to enjoy a stylish and updated kitchen that reflects your personal taste and creativity.

Maintaining and Caring for Covered Tiles
Once you have covered your kitchen tiles, it’s essential to know how to maintain and care for them properly. By following these maintenance tips and guidelines, you can ensure the longevity and beauty of your covered tiles.
Cleaning
Regular cleaning is key to keeping your covered tiles looking their best. Use a mild, non-abrasive cleaner and a soft sponge or cloth to wipe away any spills or stains. Avoid harsh chemicals or abrasive materials that can damage the covering. Remember to dry the tiles thoroughly to prevent water spots.
Preventing Scratches
To protect your covered tiles from scratches, use coasters and trivets under hot pans, pots, and dishes. Avoid dragging heavy objects across the tiles, as this can cause abrasions. Use felt pads or furniture protectors under chair legs and table bases to prevent scratching the surface.
Avoiding Excessive Moisture
Excessive moisture can affect the durability of your covered tiles. Wipe up any spills immediately to prevent water from seeping into the covering. In areas prone to high humidity, consider using a dehumidifier or ventilation fan to minimize moisture buildup.
Regular Inspections
Periodically inspect your covered tiles to identify any signs of damage or wear. Look out for cracks, chips, or loose edges. If you notice any issues, address them promptly to prevent further damage.
“Maintaining your covered tiles not only enhances their appearance but also extends their lifespan. It’s important to stay proactive and address any issues as soon as they arise.” – Victoria Smith, Home Improvement Expert
Sealing
Depending on the type of covering material used, you may need to apply a protective sealant to enhance the durability of your covered tiles. Follow the manufacturer’s instructions for sealing and resealing the tiles as necessary.
Protecting the Grout
In addition to caring for the tiles, it’s important to maintain the grout between them. Regularly clean the grout with a mild cleaner and a soft brush to prevent discoloration and buildup of dirt. Consider applying a grout sealer to protect it from stains and make it easier to clean.

With proper maintenance and care, your covered kitchen tiles will continue to enhance the aesthetic appeal and functionality of your kitchen, creating a beautiful and inviting space for years to come.
Troubleshooting Common Issues
While covering kitchen tiles can be a rewarding DIY project, it’s not uncommon to encounter some challenges along the way. In this section, we will address common issues that may arise during the kitchen tile covering process and provide troubleshooting solutions to help you overcome them.
Inadequate Adhesion
One common issue when covering kitchen tiles is inadequate adhesion of the new material. This can lead to peeling or loosening of the cover, compromising its durability and appearance. To troubleshoot this problem, ensure that you:
- Thoroughly clean and dry the tiled surface before applying the new covering.
- Use a high-quality adhesive or mortar suitable for the chosen covering material.
- Apply the adhesive or mortar evenly and according to the manufacturer’s instructions, ensuring proper coverage.
- Press the new covering firmly against the tiles, using a tile roller or a similar tool to enhance adhesion.
By following these steps, you can ensure better adhesion and prevent issues with your kitchen tile coverings.
Uneven Surface
Another common issue is an uneven surface after applying the new covering. This can result in an unappealing appearance or difficulties in maintaining the tiles. Here are some troubleshooting tips for dealing with an uneven surface:
- Before applying the new covering, use a leveling compound or a self-leveling underlayment to smooth out any uneven areas.
- If the tiles have different thicknesses, consider using a thicker adhesive or mortar to compensate for the variations.
- After applying the covering, use a leveling tool or a rubber mallet to gently tap down any raised areas.
These steps will help you achieve a more even and polished surface for your kitchen tiles.
Grout Discoloration
One issue that can affect the appearance of covered kitchen tiles is grout discoloration. Over time, grout may become stained or discolored, diminishing the overall aesthetic appeal. To troubleshoot grout discoloration:
- Clean the grout thoroughly using a grout cleaner or a mixture of vinegar and water.
- If stains persist, consider using a grout colorant or sealer to restore the grout’s original color.
- Regularly clean and maintain the grout to prevent future discoloration.
These steps will help rejuvenate the look of your covered kitchen tiles by addressing grout discoloration issues.
| Common Issue | Troubleshooting Solution |
|---|---|
| Inadequate Adhesion | Thoroughly clean and dry the surface, use high-quality adhesive or mortar, apply evenly, and press firmly. |
| Uneven Surface | Use a leveling compound, compensate for tile thickness variations, and tap down raised areas. |
| Grout Discoloration | Clean grout with a cleaner or vinegar and water, consider colorant or sealer, and maintain regular cleaning. |
By understanding these common issues and their troubleshooting solutions, you can confidently tackle any challenges that may arise during your kitchen tile covering project.
Conclusion
Transforming the look of your kitchen by covering the tiles can be a rewarding and budget-friendly DIY project. By following the steps outlined in this guide and using the right materials, you can achieve a stunning result that reflects your style and preferences.
Assessing the condition of your kitchen tiles is vital before starting the covering process. Removing any existing grout or coverings allows for a clean and smooth surface. Selecting the appropriate covering materials based on your needs and preferences is essential for a successful outcome.
Properly preparing the surface and applying the new covering ensures a long-lasting result. It’s important to maintain and care for your covered tiles to preserve their beauty and functionality. Remember that troubleshooting common issues can help you navigate challenges that may arise during the project.
With the information provided in this guide, you now have the knowledge and confidence to embark on your kitchen tile covering project. Enjoy the transformation as you create a beautiful kitchen space that you’ll love for years to come.