DIY Guide: Build Kitchen Cabinets Free Plans
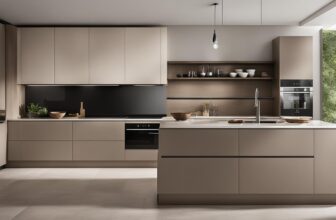
Welcome to our comprehensive DIY guide on how to build kitchen cabinets using free plans. Whether you’re a seasoned carpenter or a beginner embarking on a new project, this step-by-step guide will help you create beautiful kitchen cabinets that will transform your space.
Building your own kitchen cabinets can be a rewarding and cost-effective endeavor. With our detailed instructions, you’ll be able to unleash your inner carpenter and customize cabinets that perfectly fit your needs and style. So, let’s dive in and discover how to build kitchen cabinets with free plans.
Key Takeaways:
- Using free plans, you can build your own kitchen cabinets to suit your specific needs and style.
- Building your own cabinets can be a cost-effective and rewarding project.
- Accurate measurements and precise preparation are essential for successful cabinet construction.
- The choice of wood plays a significant role in the durability and aesthetics of your kitchen cabinets.
- Proper maintenance is crucial for the longevity of your kitchen cabinets.
Getting Started with Your DIY Kitchen Cabinet Project
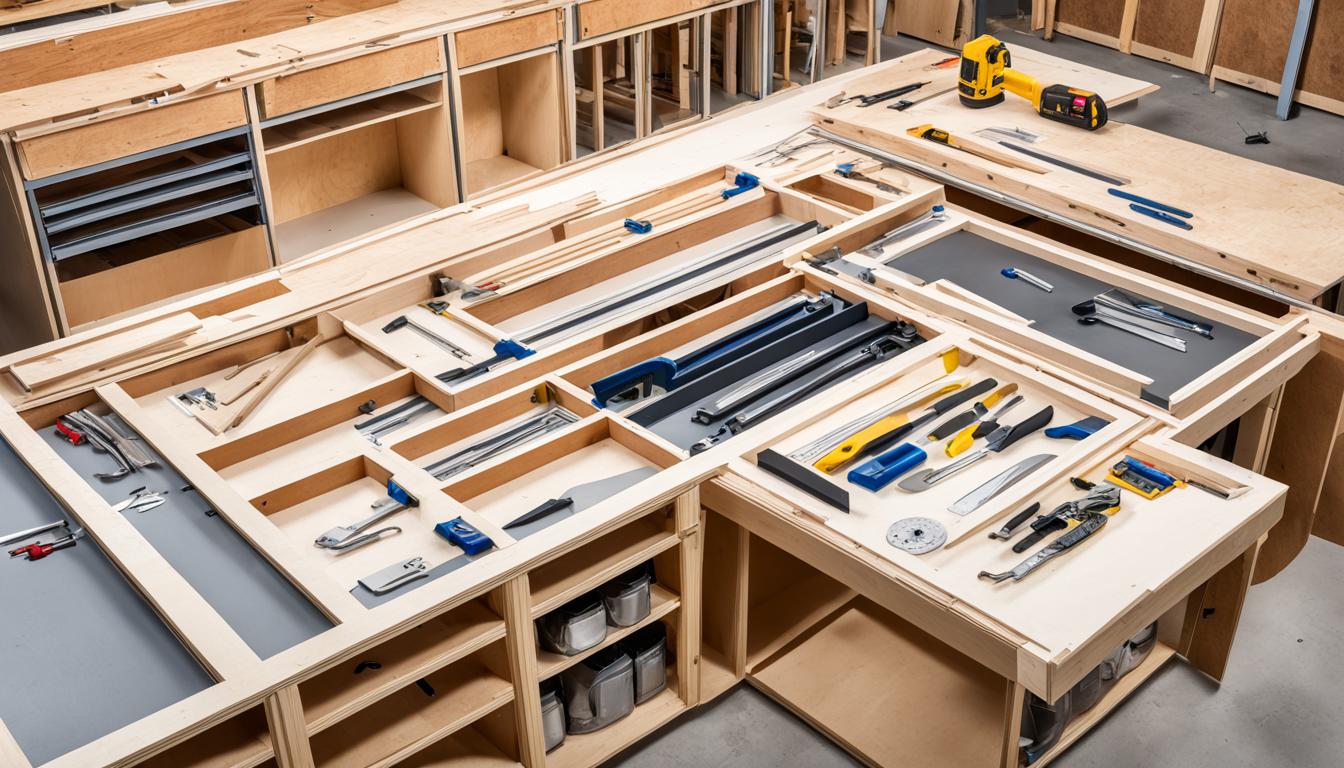
Before embarking on your DIY kitchen cabinet project, it’s essential to gather the necessary tools and materials. By having everything prepared, you can ensure a smooth and efficient construction process. Here, we will discuss the essential tools you’ll need and provide tips on selecting the right materials for your project.
Gathering Tools
To begin, you’ll require a set of basic tools to effectively build your kitchen cabinets. Here are the key tools you should have:
- Measuring Tape: Accurate measurements are crucial for precise cabinet construction.
- Screwdriver Set: Assortment of screwdrivers for various fastening needs.
- Power Drill: A power drill will significantly speed up the drilling and screwing process.
- Clamps: Clamps are useful for securing materials during assembly.
- Saw (Circular or Table): A saw will be necessary for trimming and cutting wood pieces.
- Sanding Tools: Sandpaper, sanding block, or an electric sander to smooth surfaces.
- Router: Optional but useful for creating decorative edges or making dado cuts.
Investing in high-quality tools is recommended, as they will provide better accuracy and durability throughout your project. If you don’t own any of the tools on the list, consider borrowing or renting them to complete your DIY kitchen cabinet project.
Choosing Materials
Selecting the right materials is crucial to achieving the desired look and durability of your kitchen cabinets. Here are some factors to consider:
- Wood: Choose a sturdy and visually appealing wood species for your cabinets, such as oak, maple, or cherry.
- Hardware: Select drawer pulls, door handles, and hinges that complement your cabinet design and offer reliable functionality.
- Sheet Goods: Plywood or medium-density fiberboard (MDF) are commonly used for cabinet carcasses, while solid wood is often used for doors and drawer fronts.
- Finishes: Decide on the type of finish you want for your cabinets, such as paint, stain, or a combination of both.
Choosing high-quality materials will result in longer-lasting kitchen cabinets that withstand daily use. Consider visiting local home improvement stores or specialty woodworking suppliers to explore a wide range of options.
Once you have gathered all the necessary tools and materials, you’ll be prepared to start your DIY kitchen cabinet project and bring your vision to life.
Custom Cabinet Design Tips
When it comes to designing your kitchen cabinets, customization is key. By taking the time to consider your specific needs and style preferences, you can create cabinets that not only look great but also function seamlessly in your space. In this section, we’ll share some valuable tips to help you achieve the perfect custom cabinet design.
1. Cabinet Dimensions
Before diving into the design process, it’s essential to determine the dimensions of your cabinets. Start by measuring the available space in your kitchen and take note of any existing obstacles or fixtures. Consider the height, width, and depth of your cabinets to ensure they fit perfectly in your kitchen while providing ample storage space.
2. Layout Options
Next, think about the layout of your cabinets. There are several common kitchen cabinet layouts to consider:
- Galley Kitchen: Ideal for narrow spaces, this layout features cabinets on opposite walls, maximizing storage and creating an efficient work triangle.
- L-Shaped Kitchen: This layout utilizes two adjacent walls, forming an L shape. It offers ample countertop and cabinet space, making it one of the most popular choices.
- U-Shaped Kitchen: Suitable for larger kitchens, this layout incorporates cabinets on three walls, providing plenty of storage and workspace.
- Island Kitchen: Adding an island to your kitchen allows for additional storage and countertop space, creating a central hub for cooking and entertaining.
Consider your kitchen’s size and layout to determine which option is best for you.
3. Storage Solutions
Effective storage solutions are essential for keeping your kitchen organized and clutter-free. Here are a few tips to maximize storage in your custom cabinets:
“When designing your kitchen cabinets, think beyond traditional shelving. Consider incorporating pull-out drawers, adjustable shelves, and built-in organizers to optimize every inch of space.”
By utilizing smart storage solutions, you can make the most of your cabinet space and easily access your items when needed.
4. Material Selection
The choice of materials can greatly impact the aesthetics and durability of your custom cabinets. Consider the following options:
| Material | Pros | Cons |
|---|---|---|
| Wood | Timeless, natural beauty | Can be more expensive; requires regular maintenance |
| Laminate | Durable, easy to clean | Not as visually appealing as natural wood |
| Thermofoil | Resistant to moisture and heat | Less customizable than wood |
Consider your budget, desired aesthetic, and maintenance preferences when selecting the material for your custom cabinets.
By keeping these custom cabinet design tips in mind, you can create a space that is both functional and visually appealing. Take the time to plan out your design, consider your storage needs, and select the right materials, and you’ll be well on your way to a kitchen that truly reflects your personal style.
Selecting the Perfect Cabinet Wood
When it comes to building kitchen cabinets, choosing the right wood is essential for both durability and aesthetics. The type of wood you select will determine the overall look and feel of your cabinets, as well as their ability to withstand daily wear and tear. Let’s explore different types of wood commonly used in cabinet making and how to select the perfect wood for your project.
The Importance of Wood Selection
The choice of wood impacts not only the appearance of your cabinets but also their strength and longevity. Each type of wood has its own unique characteristics, including color, grain pattern, and hardness. Considering these factors will help you create cabinets that not only complement your kitchen but also stand the test of time.
Here are some popular wood options for kitchen cabinets:
- Oak: Known for its strength and durability, oak is a timeless choice for traditional-style cabinets. It features a prominent grain pattern and can be stained in various shades to match your kitchen decor.
- Maple: Maple wood has a smooth and even grain, making it perfect for both contemporary and classic cabinet designs. It can be stained in a range of finishes to achieve the desired look.
- Cherry: Cherry wood is prized for its rich, reddish-brown color that deepens over time. It has a luxurious grain pattern that adds elegance to any kitchen. Cherry cabinets are often associated with upscale and sophisticated spaces.
- Walnut: Walnut is a popular choice for those seeking a dark, luxurious look. It features a rich, chocolate-brown color and a distinctive grain pattern. Walnut cabinets can create a warm and inviting atmosphere in your kitchen.
- Birch: Birch wood offers a beautiful, even grain pattern and a light, creamy color. It can be stained to resemble more expensive wood species, making it a cost-effective option for achieving a high-end look.
When selecting the perfect wood for your kitchen cabinets, consider factors such as your desired style, budget, and the overall aesthetic of your kitchen. Keep in mind that different wood species may vary in price and availability, so it’s important to weigh your options and find the best fit for your project.
| Wood Type | Characteristics | Style | Price Range |
|---|---|---|---|
| Oak | Prominent grain pattern, strength, durability | Traditional | $$ |
| Maple | Smooth grain, versatility | Contemporary, classic | $$ |
| Cherry | Rich color, luxurious grain | Upscale, sophisticated | $$$ |
| Walnut | Dark, rich color, distinctive grain | Luxurious, warm | $$$ |
| Birch | Even grain pattern, cost-effective | Versatile | $ |
Remember, selecting the perfect wood for your kitchen cabinets is an important decision that will impact the overall quality and appearance of your project. Consider your personal preferences, the style of your kitchen, and your budget to make an informed choice that will result in beautiful and long-lasting cabinets.
Gathering Cabinet Building Materials
Before you can start building your kitchen cabinets, it’s essential to gather all the necessary materials. By ensuring you have the right supplies, you can make the construction process smoother and more efficient. We’ll guide you through the process of selecting and sourcing the key components required for your woodworking project.
1. Cabinet Doors
The first step in gathering cabinet building materials is selecting the perfect cabinet doors. Choose from a range of styles, such as slab, raised panel, or shaker, that match your design aesthetic. Consider the material of the doors, which can be solid wood, plywood, or MDF, based on your preferences and budget. Keep in mind the dimensions of your cabinets and ensure the doors fit snugly.
2. Hinges
Hinges are integral to the functionality of your kitchen cabinets. Opt for high-quality, durable hinges that provide smooth movement and secure door closure. There are various types of hinges, including concealed, overlay, and European-style hinges. Select the appropriate type based on your cabinet design and installation requirements.
3. Drawer Slides
To ensure easy access and smooth operation of your cabinet drawers, invest in reliable drawer slides. There are different types available, such as side-mount, under-mount, and center-mount slides. Consider factors like weight capacity, installation method, and drawer extension length when choosing the right slides for your cabinets.
4. Drawer Pulls and Knobs
Add a touch of personal style to your cabinets by selecting drawer pulls and knobs that complement your overall design. Whether you prefer modern, traditional, or vintage-inspired hardware, there are countless options to choose from. Consider the size, finish, and design of the pulls and knobs to ensure they enhance the aesthetic appeal of your cabinets.
5. Cabinet Accessories
To maximize functionality and organization within your cabinets, consider adding accessories such as pull-out shelves, spice racks, or wire baskets. These additions can greatly improve storage efficiency and make your kitchen more user-friendly.
| Materials | Pros | Cons |
|---|---|---|
| Solid Wood | Durable and visually appealing | Can be expensive and prone to expansion/contraction with changes in humidity |
| Plywood | Strong and resistant to warping | Not aesthetically pleasing when left exposed |
| MDF | Smooth surface for paint finishes | Not as structurally strong as solid wood or plywood |
By carefully selecting and sourcing the right materials for your kitchen cabinets, you can ensure a successful and satisfying construction process. Take the time to consider your design preferences, budget, and desired functionality to make informed choices. With the proper materials in hand, you’ll be well-equipped to transform your kitchen with beautiful, custom-built cabinets.

Measuring and Preparing the Cabinet Components
Accurate measurements and precise preparation of cabinet components are essential for a successful cabinet construction. To ensure that your kitchen cabinets fit perfectly and function flawlessly, follow our detailed instructions on measuring and preparing the necessary parts.
Gathering the Tools
Before you start measuring and cutting your cabinet components, gather the following tools:
- Tape measure
- Straightedge
- Pencil
- Circular saw or table saw
- Jigsaw (for curved or irregular cuts)
- Power drill
- Clamps (for holding pieces in place during cutting)
Measuring the Cabinet Parts
Begin by measuring the area where you plan to install your kitchen cabinets. Take accurate measurements of the height, width, and depth, accounting for any irregularities in the walls or floors. Record these measurements on a piece of paper or in a digital document for reference.
Next, use your measurements to determine the dimensions of the cabinet parts. Refer to the woodworking plans for cabinets to guide you through this process. Note the sizes of the cabinet sides, back, bottom, and shelves. Take into account the thickness of the wood and any allowances for gaps or hardware.
Remember to double-check all measurements before making any cuts. It’s better to be safe than sorry, so measure twice, cut once!
Preparing and Cutting the Cabinet Components
Once you have your measurements, it’s time to prepare the wood for cutting. Start by marking the dimensions of each cabinet part on the appropriate wood panels. Use a straightedge and pencil to ensure accurate lines.
Before cutting, make sure to secure the wood panels in place using clamps or weights. This will prevent any unnecessary movement during the cutting process, ensuring clean and precise cuts.
Use a circular saw or table saw to cut the cabinet parts according to the marked lines. If you need to make curved or irregular cuts, a jigsaw can be used. Take your time and follow the manufacturer’s guidelines for operating the tools safely.
After cutting the cabinet components, carefully label each piece to avoid confusion during assembly. Use a pencil or masking tape to indicate which part corresponds to which section of the cabinet.
Once you have measured and prepared the cabinet components, you are now ready to move on to the next step in the cabinet construction process. In the following section, we will guide you through the step-by-step process of assembling your kitchen cabinets.
Cabinet Assembly Techniques
Now that you have all your cabinet components measured and prepared, it’s time to assemble your kitchen cabinets. In this section, we will guide you through the step-by-step process of joining the cabinet sides and bottom, as well as attaching doors and hardware. By following these assembly techniques, you’ll be on your way to creating sturdy and functional cabinets that will elevate your kitchen.
Joining the Cabinet Sides and Bottom
To begin the assembly process, you’ll need to join the cabinet sides and bottom. This can be done using various joinery methods such as pocket holes, dowels, or biscuits. Choose the method that best suits your skill level and tools available. Ensure that the joints are tight and secure to provide a solid foundation for your cabinet.
Pro Tip: Apply wood glue to the joints before securing them with your chosen joinery method for added strength and stability.
Attaching Doors and Hardware
Once the cabinet frame is assembled, it’s time to attach the doors and hardware. Start by installing the hinges onto the cabinet frame and aligning them with the corresponding hinge plates on the doors. Use a drill and screws to secure the hinges in place. Ensure that the doors are aligned properly and open and close smoothly.
Next, install the cabinet knobs or pulls according to your preferred design. Measure and mark the desired location for each piece of hardware, then use a drill or screwdriver to attach them securely.
Testing and Adjusting
After assembling your kitchen cabinets, it’s important to thoroughly test their functionality. Open and close the doors and drawers multiple times to ensure smooth operation. Check for any misalignments or issues in the hardware that may require adjustment.
If you encounter any problems, such as doors not closing properly or drawers sticking, don’t worry. These issues are common and can often be resolved with minor adjustments. Take the time to make any necessary tweaks to ensure your cabinets are functional and visually appealing.
With the assembly techniques covered in this section, you’re well on your way to completing your DIY kitchen cabinet project. In the next section, we’ll delve into the exciting world of adding finishing touches to your cabinets, exploring different finishes and techniques that will bring your cabinets to life.
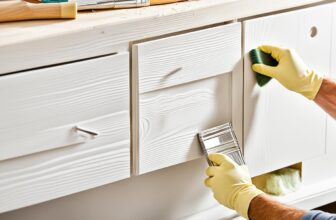
Adding Finishing Touches to Your Cabinets
Once you have assembled your kitchen cabinets, it’s time to give them the perfect finishing touch. The right finishes and techniques can enhance the appearance of your cabinets, making them look professional and beautiful.
One popular option for finishing cabinets is staining. Staining allows the natural beauty of the wood to shine through while adding depth and richness to the color. Choose a stain that complements your kitchen’s overall aesthetic and apply it evenly to all surfaces of the cabinets. Don’t forget to protect the stained cabinets with a clear coat or varnish, ensuring they stay protected and glossy for years to come.
If you prefer a painted finish, there are endless color options to choose from. Consider the color scheme of your kitchen and select a shade that will complement or contrast with the surrounding elements. Before painting, make sure to clean and prep the cabinets properly to achieve a smooth and flawless finish. Apply multiple thin coats of paint, allowing each layer to dry before adding the next. Seal the cabinets with a clear topcoat to protect the paint from everyday wear and tear.
Another option to consider is applying a varnish or lacquer. This finish provides a glossy and durable surface, adding sophistication to your cabinets. Apply several thin coats of varnish or lacquer, sanding lightly between each coat for a smooth and polished look. The high gloss finish will make your cabinets a standout feature in your kitchen.
Here are some additional tips for achieving a professional finish on your cabinets:
- Use high-quality brushes or sprayers for a smooth and even application.
- Take your time and apply thin coats rather than one thick layer, to avoid drips and unevenness.
- Consider adding decorative elements such as molding or trim to further enhance the appearance of your cabinets.
With the right finishes and techniques, you can transform your cabinets into a focal point of your kitchen. Whether you prefer the natural beauty of stained wood, the versatility of painted cabinets, or the elegance of a glossy varnish, the options are endless. Choose the finish that best complements your kitchen’s style and gives your cabinets the perfect final touch.
Installing Your DIY Kitchen Cabinets
Once your kitchen cabinets are assembled and finished, it’s time to bring your vision to life by installing them in your space. This final step ensures that your cabinets fit seamlessly and securely in your kitchen. Follow our expert guidelines and handy tips below to ensure a successful installation process.
1. Preparation is Key
Before you start installing your cabinets, make sure to prepare your kitchen by emptying and cleaning the area. Remove any existing cabinets or fixtures that may interfere with the installation process. Take accurate measurements, ensuring that your walls are level and plumb to ensure a precise fit. Proper preparation will save you time and headaches during the installation.
2. Secure the Cabinets to the Wall
Begin by identifying the stud locations on your walls. Mark these locations with a pencil for reference. With the help of a friend or a partner, carefully lift the first cabinet into place, aligning it with the reference marks. Use a power drill to secure the cabinet to the wall through the back panel and into the studs. Repeat this process for each cabinet, ensuring that they are level and properly aligned with each other.
3. Leveling and Adjusting the Cabinets
It’s essential to ensure that your cabinets are level and plumb to maintain their structural integrity and visual appeal. Make adjustments as necessary using shims or adjustable cabinet legs. Ensure that the cabinet doors and drawers operate smoothly and align properly. Take your time during this step to achieve a professional, finished look.
4. Connecting and Aligning Cabinets
If you have multiple cabinets that need to be installed side by side, use cabinet clamps to connect and align them. This step is crucial to create a seamless transition between cabinets. Make sure to check that the face frames align perfectly and that any gaps are consistent for a professional finish.
5. Secure Countertops and Hardware
After the cabinets are securely installed, it’s time to attach your countertops. Follow the manufacturer’s instructions and use proper hardware to ensure a stable and secure connection. Double-check that your countertops are level and properly aligned with the cabinets.
Finally, attach the cabinet hardware, such as knobs or handles, to complete the installation process. Choose hardware that complements your kitchen’s style and adds a finishing touch to your cabinets.
Your hard work and attention to detail have paid off! Step back and admire your beautifully installed DIY kitchen cabinets, reflecting your craftsmanship and personal style.

| Installation Tips | Things to Remember |
|---|---|
| 1. Always use appropriate safety gear, including gloves and safety glasses, during the installation process. | 1. Double-check your measurements and levels regularly throughout the installation. |
| 2. Consider using a stud finder to locate and mark the stud positions accurately. | 2. Take your time and be patient. Rushing can lead to mistakes and uneven installation. |
| 3. Use a level and straightedge to ensure that your cabinets are perfectly aligned. | 3. Seek assistance from a professional if you are unsure about any aspect of the installation. |
| 4. Secure all connections firmly, but be cautious not to overtighten and damage the materials. | 4. Maintain proper ventilation when using adhesives or paints during the installation process. |
Cabinet Organization and Storage Ideas
When it comes to maximizing the functionality of your kitchen cabinets, clever storage solutions and organization ideas are key. By implementing these innovative strategies, you can make the most of your cabinet space and keep everything neatly organized.
Adjustable Shelving
One effective way to optimize your kitchen cabinets is by installing adjustable shelving. This allows you to customize the spacing between shelves based on the items you need to store. Whether you have tall appliances or shorter dishes, adjustable shelves can accommodate items of various sizes.
Specialized Compartments
Consider incorporating specialized compartments into your cabinet design. These compartments can be specifically designed to hold items like spices, cutting boards, or baking sheets, making them easily accessible and neatly organized. You can use dividers or inserts to create these dedicated spaces within your cabinets.
“Using specialized compartments in your kitchen cabinets can help keep everything in its place and make cooking and meal prep more efficient.”
Pull-Out Drawers
Another space-saving option is to install pull-out drawers in your kitchen cabinets. These drawers provide easy access to items at the back of the cabinet, eliminating the need to reach and rummage through the entire cabinet. Pull-out drawers are particularly useful for storing pots, pans, and small appliances.
Door-Mounted Storage
Make use of the inside of your cabinet doors by adding door-mounted storage options. This can include spice racks, hooks for hanging utensils, or a magnetic strip for storing knives. Door-mounted storage helps to maximize the vertical space and keeps frequently used items within reach.
Labeling and Categorization
Labeling and categorizing the contents of your kitchen cabinets can greatly enhance organization. Use clear bins or containers to group similar items together and label them accordingly. This makes it easier to find what you need and prevents clutter from accumulating.
Utilize Unused Space
Don’t let any space in your kitchen cabinets go to waste. Consider utilizing the unused areas, such as the top or sides of cabinets, by installing hooks or racks. These additional storage options can be used to hang mugs, wine glasses, or even cutting boards, freeing up valuable shelf space.
By implementing these storage and organization ideas, you can transform your kitchen cabinets into efficient and clutter-free spaces. Get creative and customize your cabinets to suit your unique storage needs and preferences.
Maintaining and Caring for Your Kitchen Cabinets
Proper maintenance and care are crucial for the longevity of your kitchen cabinets. By following these tips on cleaning, repairing minor damages, and keeping your cabinets looking as good as new, you can preserve their beauty for years to come.
Cleaning Tips
Regular cleaning is essential to prevent dirt, grease, and stains from accumulating on your cabinets. Here’s how to keep them clean:
- Use a gentle cleaner: Avoid harsh chemicals that can damage the finish of your cabinets. Instead, opt for a mild soap and water solution or a non-abrasive cleaning product specifically designed for wood surfaces.
- Wipe spills immediately: Spills and splatters should be wiped off as soon as they occur to prevent staining or warping of the wood.
- Dust regularly: Use a soft cloth or feather duster to remove dust from your cabinets. Pay attention to the corners and crevices where dust tends to accumulate.
- Don’t forget the hardware: Clean the cabinet hardware, such as knobs and handles, regularly to maintain their shine and prevent tarnishing.
Repairing Minor Damages
Even with proper care, your kitchen cabinets may develop minor damages over time. Here are some DIY solutions for common issues:
- Scratches: For minor scratches, use a touch-up marker or crayon that matches the color of your cabinets. Apply it to the scratched area and gently blend it in with a soft cloth.
- Dents: To fix small dents, use a damp cloth to soften the wood fibers around the dent. Then, apply steam using an iron on low heat while hovering over the dent for a few seconds. The steam will cause the wood fibers to expand and reduce the appearance of the dent.
- Loose hinges or handles: Tighten loose hinges or handles using a screwdriver. If the screw holes are stripped, fill them with wood filler before reinserting the screws.
Keeping Cabinets Looking as Good as New
With regular care and preventive measures, you can ensure that your kitchen cabinets stay in top condition:
- Protect from heat and moisture: Avoid placing hot pans or dishes directly on the cabinet surface to prevent damage. Use trivets or hot pads instead. Additionally, keep your cabinets away from sources of moisture, such as sinks or dishwashers.
- Avoid harsh chemicals: Avoid using abrasive cleaners or chemicals that can damage the finish of your cabinets. Stick to mild, wood-safe cleaning products.
- Check and tighten hardware: Regularly check the screws, hinges, and handles of your cabinets to ensure they are secure. Tighten any loose hardware to prevent further damage.
“By following these maintenance tips, you can preserve the beauty of your kitchen cabinets and enjoy them for years to come.”
| Cleaning Tips | Repairing Minor Damages | Keeping Cabinets Looking as Good as New | |
|---|---|---|---|
| Regular Cleaning | Use gentle cleaner Wipe spills immediately Dust regularly Don’t forget the hardware |
Scratches: Touch-up marker or crayon Dents: Applying steam Loose hinges or handles: Tighten or fill with wood filler |
Protect from heat and moisture Avoid harsh chemicals Check and tighten hardware |
Conclusion
In conclusion, building your own kitchen cabinets using free plans can be a rewarding and cost-effective project. With our comprehensive guide and step-by-step instructions, you’ll be able to unleash your inner carpenter and create customized cabinets that perfectly fit your space and style.
By embarking on this DIY journey, you not only save money but also have the opportunity to showcase your craftsmanship and create cabinets that are uniquely yours.
Imagine the satisfaction of completing a project that adds both beauty and functionality to the heart of your home. Whether you’re a seasoned pro or a beginner, the detailed instructions provided in this guide will ensure that you have the knowledge and confidence to tackle this project with ease.
So why wait? Start building your dream kitchen cabinets today and enjoy the pride of knowing that you’ve created a masterpiece that will be admired by all who enter your home.