Revamp Your Space: Paint Gloss Kitchen Cabinets!

Are you tired of the outdated look of your gloss kitchen cabinets? Do you want to give your kitchen a fresh new makeover without breaking the bank? Look no further! In this article, we’ll show you how to paint your gloss kitchen cabinets and transform your space into a modern oasis.
Many homeowners are often hesitant about painting gloss cabinets, assuming it’s a difficult and time-consuming task. However, with the right techniques and expert tips, painting gloss kitchen cabinets can be a rewarding and cost-effective home improvement project.
By following our step-by-step guide and using high-quality paints specifically designed for gloss surfaces, you can achieve a stunning new look for your kitchen cabinets. Whether you prefer a classic white finish or a bold and vibrant color, painting your gloss cabinets allows you to personalize your space and create a kitchen that reflects your style and personality.
So, are you ready to take on the challenge of transforming your gloss kitchen cabinets? Read on to discover the secrets to a successful gloss cabinet painting project.
Key Takeaways:
- Painting gloss kitchen cabinets is a cost-effective way to give your kitchen a fresh new look.
- With the right techniques and expert tips, painting gloss cabinets can be a rewarding DIY project.
- Using high-quality paints specifically designed for gloss surfaces ensures a professional-looking finish.
- Personalize your space by choosing a color that reflects your style and personality.
- Follow our step-by-step guide to achieve stunning results and transform your kitchen cabinets.
Understanding Gloss Kitchen Cabinets
Before you embark on your gloss kitchen cabinet painting project, it’s crucial to have a good understanding of gloss finishes and the best paint options available. By familiarizing yourself with these key aspects, you can achieve impeccable results and breathe new life into your kitchen.
Exploring Different Types of Gloss Finishes
Gloss finishes are known for their smooth and reflective appearance. They can range from high gloss to semi-gloss, each offering a unique level of shine and sheen. Understanding the differences between these types of finishes will help you choose the one that suits your aesthetic preferences and design vision.
Here’s a breakdown of the different gloss finishes:
| Finish Type | Description |
|---|---|
| High Gloss | A highly reflective finish with a mirror-like appearance. It creates a striking and modern look, but it can accentuate imperfections and fingerprints more visibly. |
| Semi-Gloss | Offers a moderate level of shine and durability while still being relatively easy to maintain. It strikes a balance between high gloss and matte finishes. |
| Eggshell | A subtle sheen that adds a touch of elegance to your cabinets. It provides a smooth finish with minimal reflection and is a popular choice for both traditional and contemporary kitchens. |
| Satin | A slightly higher sheen than eggshell, satin finishes enhance the visual appeal of your cabinets without being overly reflective. They are resistant to stains and easier to clean. |
| Matte | A low-sheen finish that offers a smooth and velvety appearance. Matte finishes are excellent for hiding imperfections and fingerprints, making them a popular choice for busy kitchens. |
Choosing the Best Paint for Gloss Cabinets
To achieve a professional-looking and long-lasting finish on your gloss kitchen cabinets, selecting the right paint is crucial. Not all paints are designed to adhere well to glossy surfaces, so it’s essential to choose a paint specifically formulated for this purpose.
The best paint for gloss cabinets will have the following qualities:
- Excellent adhesion to glossy surfaces, ensuring long-term durability.
- High-quality ingredients that deliver a smooth and flawless finish.
- Resistant to chipping, peeling, and yellowing, even in high-moisture areas like kitchens.
- Low VOC (volatile organic compound) content, making it more environmentally friendly.
Before purchasing your paint, consider consulting with paint specialists or experts at your local home improvement store. They can recommend specific brands and product lines that are known for their exceptional performance on gloss cabinets.
By understanding different gloss finishes and selecting the best paint for the job, you’re setting yourself up for successful gloss kitchen cabinet painting. Armed with this knowledge, let’s move on to the next section to learn how to properly prepare your cabinets for painting.
Preparing Your Cabinets for Painting
Proper preparation is essential to achieving a professional-looking finish when painting gloss cabinets. By following these DIY gloss cabinet painting tips, you can ensure that your cabinets are clean, smooth, and well-primed, resulting in optimal paint adhesion and long-lasting durability.
1. Cleaning
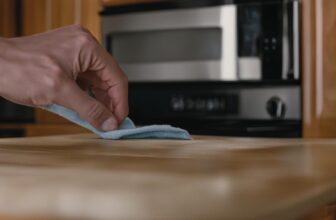
Begin by thoroughly cleaning your cabinets to remove any dirt, grease, or debris that may interfere with paint adhesion. Use a mild detergent and warm water solution to gently scrub the surfaces, ensuring all areas, including corners and edges, are clean. Rinse the cabinets with clean water and allow them to dry completely before proceeding.
2. Sanding
Sanding is an important step in preparing gloss cabinets for painting. It helps to create a rough surface for the paint to adhere to and removes any glossy finish, enabling better paint adhesion. Use medium-grit sandpaper (120-150 grit) to lightly sand the entire surface of the cabinets, including doors, drawers, and frames. Sand in the direction of the wood grain and be sure to smooth any imperfections or rough spots.
3. Filling and Repairing
If your gloss cabinets have any visible dents, scratches, or holes, it’s important to address these issues before painting. Use wood filler to fill in any holes or gaps, and sand the filled areas until they are flush with the rest of the surface. For deeper scratches and dents, consider using a wood putty or epoxy filler for more substantial repairs.
4. Priming
Priming is a crucial step in ensuring proper paint adhesion and achieving a smooth, even finish on gloss cabinets. Apply a high-quality primer that is specifically designed for use on glossy surfaces. Use a brush or roller to apply an even coat of primer to the cabinets, ensuring complete coverage. Allow the primer to dry according to the manufacturer’s instructions before proceeding with the paint application.

5. Protecting Surrounding Areas
Before you start painting, it’s important to protect the surrounding areas from accidental paint splatters or drips. Cover countertops, floors, and any nearby furniture with drop cloths or plastic sheets to prevent damage. Also, use painter’s tape to mask off any areas you do not want to paint, such as hinges or handles.
| Material | Quantity |
|---|---|
| Mild detergent | 1-2 tablespoons |
| Warm water | 1 gallon |
| Medium-grit sandpaper (120-150 grit) | 1-2 sheets |
| Wood filler | As needed |
| Primer | 1 can |
| Drop cloths or plastic sheets | As needed |
| Painter’s tape | As needed |
By following these steps and employing the DIY gloss cabinet painting tips, you’ll be well on your way to achieving a professional-looking finish on your gloss cabinets. Remember to take your time, follow proper safety precautions, and have all the necessary tools and materials on hand. With patience and attention to detail, you can transform your cabinets and create a beautiful, refreshed space.
Choosing the Right Paint for Gloss Cabinets
When it comes to painting gloss cabinets, not all paints are created equal. The type of paint you choose will greatly impact the overall appearance and durability of your cabinets. To ensure a successful painting project, it’s important to invest in the best paint for gloss cabinets. Here’s what you need to consider:
Types of Paint for Gloss Cabinets
There are various types of paint available for gloss cabinets, each with its own advantages and considerations. Here are some popular options:
- Oil-based paint: Known for its durability and smooth finish, oil-based paint is an excellent choice for gloss cabinets. It provides a hard, protective surface that is resistant to wear and tear.
- Acrylic paint: Acrylic paint is water-based and offers quick drying times, easy cleanup, and low odor. It is a popular choice for DIY projects and provides a durable finish.
- Latex paint: Latex paint is another water-based option that offers a wide range of color choices and easy application. It is known for its quick drying time and minimal odor.
Factors to Consider
When selecting the right paint for your gloss cabinets, there are a few key factors to keep in mind:
- Sheen level: Consider the desired sheen level for your cabinets. Gloss, semi-gloss, and satin are common sheen options for kitchen cabinets.
- Durability: Look for paints specifically formulated for high-traffic areas to ensure long-lasting results. Cabinets endure daily use and need a paint that can withstand regular cleaning.
- Adhesion and coverage: Choose a paint that provides excellent adhesion to glossy surfaces and offers good coverage in just a few coats.
By considering these factors and selecting the best paint for gloss cabinets, you can achieve a beautiful and durable finish that enhances the overall look and feel of your kitchen.
Choosing the right paint is crucial for achieving a professional-looking result. Don’t cut corners when it comes to selecting your paint—invest in quality materials that will stand the test of time.
Tools and Materials You’ll Need
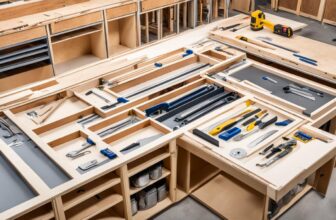
Gathering the right tools and materials is crucial for a successful gloss kitchen cabinet painting project. Ensure that you’re well-prepared with the following essentials:
Tools:
- Paintbrushes
- Roller and roller tray
- Sandpaper (medium and fine grit)
- Sanding block or electric sander
- Tack cloth or microfiber cloth
- Drop cloths or plastic sheets
- Painter’s tape
- Paint tray and liners
- Stir sticks
- Putty knife or scraper
- Screwdriver
- Drill (if removing cabinet hardware)
Materials:
- Primer
- Gloss paint for cabinets
- Paint thinner (if using oil-based paint)
- Cabinet degreaser or mild detergent
- Wood filler or spackle
- Masking paper or plastic wrap
- Safety goggles
- Respirator mask
- Gloves
Make sure you have everything ready and within reach before you start your DIY gloss cabinet painting. Having the right tools will help you achieve professional-looking results.
Remember, using high-quality tools and materials will make a noticeable difference in the outcome of your project.
Step-by-Step Guide to Painting Gloss Cabinets
Transform your gloss cabinets into stunning focal points by following our detailed step-by-step instructions. With our expert tips and techniques, you can achieve a professional-looking finish that will breathe new life into your kitchen.
Materials You’ll Need
Before you start painting, gather the following materials:
- Paint primer
- High-quality paint suitable for gloss cabinets
- Paintbrushes and rollers
- Sandpaper or sanding block
- Clean cloth or sponge
- Painter’s tape
- Dust mask and goggles
Step 1: Surface Preparation
Start by removing all hardware, such as handles and hinges, from the cabinets. Place them in a safe location for later use. Then, clean the surfaces of the cabinets thoroughly using a mild detergent and warm water. Rinse off any residue and allow the cabinets to dry completely.
Next, lightly sand the cabinet surfaces with fine-grit sandpaper or a sanding block. This step helps create a smooth surface for the paint to adhere to. Wipe away any dust or debris with a clean cloth or sponge.
Step 2: Priming
Apply a coat of high-quality primer specifically designed for gloss cabinets. Use a brush or roller to ensure even coverage. Allow the primer to dry completely before moving on to the next step. Refer to the manufacturer’s instructions for drying times.
Step 3: Applying the Paint
Now it’s time to apply the paint to your gloss cabinets. Use a brush or roller to achieve an even and smooth application. Start with the inner edges and corners of the cabinets before moving on to the larger surfaces. Apply thin and even coats, allowing each coat to dry completely before adding another layer.
If you prefer a more professional finish, consider using a paint sprayer for a seamless application. Ensure proper ventilation and follow safety guidelines when using a sprayer.
Step 4: Drying and Curing
Once you’ve applied the final coat of paint, allow the cabinets to dry according to the manufacturer’s instructions. This drying period is crucial for the paint to cure properly and ensure a durable finish.
Step 5: Reinstalling Hardware
After the paint has fully cured, reinstall the hardware onto the cabinets. Take your time to align the handles and hinges properly for a polished look.
And there you have it! Your newly painted gloss cabinets are ready to dazzle your kitchen. Enjoy the refreshed look and admire the transformation you’ve accomplished.

| Step | Instructions |
|---|---|
| 1 | Remove hardware and clean the cabinets thoroughly. |
| 2 | Lightly sand the cabinet surfaces and wipe away dust or debris. |
| 3 | Apply a coat of primer and allow it to dry completely. |
| 4 | Paint the cabinets using a brush, roller, or sprayer. |
| 5 | Allow the paint to dry and cure according to instructions. |
| 6 | Reinstall the hardware onto the cabinets. |
Achieving a Smooth and Even Finish
When it comes to gloss kitchen cabinet painting, one of the key goals is to achieve a smooth and even finish. The last thing you want is visible brush strokes or uneven areas that detract from the overall look of your cabinets. Fortunately, with the right techniques, you can achieve a flawless result that rivals the work of professionals.
To help you achieve that professional gloss cabinet painting look, we’ve gathered some expert tips:
- Use high-quality brushes: Invest in good quality brushes specifically designed for painting cabinets. Look for ones with synthetic bristles that provide a smooth application and minimize brush strokes.
- Apply thin, even coats: Instead of applying one thick coat, it’s better to apply multiple thin coats. This allows the paint to dry faster, resulting in a smoother finish. Make sure to wait for each coat to dry completely before applying the next one.
- Sand between coats: Lightly sand the surface between coats using fine-grit sandpaper (around 220-grit). This helps to level out any imperfections and ensures a smooth surface for the next coat of paint.
- Consider using a sprayer: If you have access to a paint sprayer, it can provide an extra level of precision and a more even application. However, sprayers require proper technique and setup to avoid overspray or uneven distribution.
- Opt for self-leveling paint: Some paints are formulated to self-level, meaning they smooth out as they dry, minimizing brush marks and providing a more even finish. Consider using these types of paints for your gloss cabinets.
By following these expert techniques, you can ensure that your gloss cabinets have a flawless finish that rivals the work of professionals. Say goodbye to visible brush strokes and hello to a stunning transformation.
“Painting gloss cabinets requires attention to detail and proper technique for a smooth and even finish. With the right brushes, thin coats, and a little bit of patience, you can achieve professional-level results.”
Explore these tips and techniques as you embark on your gloss kitchen cabinet painting project. Your hard work will be rewarded with cabinets that look professionally painted, breathing new life into your space.

| Benefits of a Smooth and Even Finish | Why It Matters |
|---|---|
| Enhanced aesthetic appeal | A smooth finish enhances the overall appearance of your gloss cabinets, making them stand out as a focal point in your kitchen. |
| Easier cleaning and maintenance | A smooth surface is easier to clean and maintain, making it simple to wipe away any spills or stains that may occur. |
| Professional look | By achieving a smooth and even finish, your gloss cabinets will have a professional look that adds value to your home. |
| Increased durability | A well-applied finish helps protect the cabinet surface, making it more resistant to scratches, chips, and other damage. |
Troubleshooting Common Painting Issues
Embarking on a DIY gloss cabinet painting project can be exciting, but it’s not without its challenges. Common painting issues can arise, such as paint drips, smudges, and uneven coverage, which can affect the overall look of your cabinets. However, with the right knowledge and techniques, you can troubleshoot these problems and achieve a polished end result.
- Paint Drips: One of the most common issues when painting cabinets is dealing with paint drips. These unsightly blobs can form if you apply too much paint or fail to properly brush out any excess. To avoid paint drips, make sure to apply thin coats of paint and smooth out any buildup before it dries.
- Smudges: Smudges can occur when the paint hasn’t fully dried or when you accidentally touch the surface before it’s cured. To prevent smudges, always allow each coat of paint to fully dry before moving on to the next. If you do encounter smudges, gently sand the area and apply a thin layer of paint to correct the issue.
- Uneven Coverage: Achieving consistent and even coverage is crucial for a professional-looking finish. Uneven coverage can occur if you don’t apply enough paint or if you apply it unevenly. To ensure even coverage, use smooth and controlled brush strokes, apply multiple thin coats of paint, and ensure that the paint is properly mixed to avoid any inconsistencies.
Remember, practice makes perfect, and troubleshooting common painting issues is part of the learning process. Don’t get discouraged if you encounter some bumps along the way. With patience and attention to detail, you can overcome these challenges and achieve the beautifully painted gloss cabinets you envisioned.
“Painting is just another way of keeping a diary.” – Pablo Picasso

| Common Painting Issues | Troubleshooting Tips |
|---|---|
| Paint Drips | Apply thin coats of paint and smooth out excess before it dries. |
| Smudges | Allow each coat of paint to fully dry before touching the surface. |
| Uneven Coverage | Use smooth brush strokes, apply multiple thin coats, and ensure proper paint mixing. |
Adding Style with Finishing Touches
Once you’ve painted your gloss kitchen cabinets to perfection, it’s time to add those essential finishing touches that will elevate the overall style of your space. These small details can make a big difference in the final look of your cabinets. From decorative hardware to glossy clear coats, there are several options to customize your cabinets and achieve the desired aesthetic.
1. Decorative Cabinet Hardware
One way to enhance the visual appeal of your gloss cabinets is by replacing the existing hardware with decorative options. Consider stylish knobs, pulls, or handles that complement your kitchen’s overall design theme. You can choose from a variety of materials such as brass, chrome, or ceramic to add a touch of elegance or modernity to your cabinets.
2. Trendy Glass Inserts
If you want to add a touch of sophistication and visual interest to your gloss cabinets, consider incorporating trendy glass inserts. These can be in the form of transparent or frosted glass panels that replace some of the cabinet doors. Not only will this transform the look of your cabinets, but it will also allow you to display your favorite dishware or decorative items.
3. Stylish Lighting
Proper lighting can enhance the beauty of your gloss cabinets. Install under-cabinet LED lights to create a warm and inviting ambiance in your kitchen. These lights not only highlight the cabinets but also provide functional task lighting for your countertop workspace.
4. High-Gloss Clear Coat
For an extra level of shine, apply a high-gloss clear coat over your painted cabinets. This finishing touch adds depth and sheen, giving your cabinets a polished and professional look. Ensure that you choose a clear coat specifically designed for use on painted surfaces and follow the manufacturer’s instructions for application.
5. Exquisite Crown Molding
Crown molding is an elegant addition that can give your gloss cabinets a more upscale and refined look. It creates a seamless transition between the cabinets and the ceiling, adding an element of sophistication to your kitchen. Consider selecting a style and finish that complements the cabinet doors and the overall design of your space.
By incorporating these finishing touches, you can take your DIY gloss cabinet painting project to the next level. These simple yet effective enhancements will not only enhance the visual appeal of your cabinets but also add a personal touch to your kitchen.
Maintaining Your Painted Gloss Cabinets
Once you’ve completed your gloss kitchen cabinet painting project and achieved a stunning new look, it’s important to take proper care of your cabinets to ensure they continue to look beautiful for years to come. Follow these tips for maintaining the beauty and longevity of your painted gloss cabinets:
Cleaning Your Cabinets
To keep your cabinets looking their best, regularly clean them with a soft, damp cloth and a mild, non-abrasive cleaner. Avoid using harsh chemicals or abrasive cleaners that can damage the paint finish. Gently wipe away any spills or stains as soon as they occur to prevent them from setting in.
Protecting the Finish
To protect the paint finish on your gloss cabinets, use coasters or placemats when placing hot, wet, or abrasive objects on the surface. This will help prevent any heat damage, water stains, or scratches that can mar the appearance of your cabinets.
Avoiding Excessive Moisture
Gloss cabinets can be more susceptible to moisture damage compared to other finishes. Avoid excessive moisture in your kitchen by using exhaust fans while cooking, wiping up spills promptly, and ensuring proper ventilation. This will help prevent the paint from peeling or warping due to moisture exposure.
Regular Inspections
Regularly inspect your cabinets for any signs of wear or damage. Check for any chips, cracks, or areas where the paint may be peeling. Address these issues promptly by touching up the affected areas to maintain the overall appearance of your cabinets.
Avoiding Abrasive Cleaning Tools
When cleaning your gloss cabinets, avoid using abrasive cleaning tools such as scrub brushes or scouring pads. These can scratch the paint surface and dull the glossy finish. Stick to soft cloths or sponges for gentle cleaning.
By following these maintenance tips, you can preserve the beauty and longevity of your painted gloss cabinets, ensuring they remain a stunning focal point in your kitchen for years to come.
| Maintenance Tips for Painted Gloss Cabinets |
|---|
| Regularly clean your cabinets with a soft, damp cloth and mild cleaner |
| Use coasters or placemats to protect the finish from hot, wet, or abrasive items |
| Avoid excessive moisture and maintain proper ventilation in the kitchen |
| Inspect cabinets regularly for any signs of wear or damage and address promptly |
| Avoid using abrasive cleaning tools that can scratch the paint surface |
By implementing these maintenance practices, you can ensure that your painted gloss cabinets retain their stunning appearance and continue to be a showcase feature in your kitchen. Follow these tips to keep your cabinets looking beautiful and enjoy the lasting results of your DIY gloss cabinet painting project.
Expert Advice for Exceptional Results
When it comes to achieving professional gloss cabinet painting results, who better to turn to than experienced painters who have honed their craft? In this section, we’ll share valuable insights and advice from these industry experts, giving you the knowledge you need to take your gloss cabinet painting to the next level.
By learning from the years of experience and expertise these professionals bring to the table, you’ll be equipped with the tools and techniques necessary to achieve exceptional results in your own cabinet painting project.
| Expert | Tip |
|---|---|
| Emily Carter | Always start with a clean and dry surface before applying any paint. This ensures proper paint adhesion and helps in achieving a smooth, even finish. |
| Michael Reynolds | Invest in high-quality brushes and rollers. Cheap applicators can leave behind streaks and brush marks, while quality tools ensure a seamless application. |
| Michelle Davis | Don’t rush the drying time between coats. Allowing each coat to fully dry before applying the next helps prevent tackiness and promotes durability. |
| David Thompson | Consider using a primer specifically designed for gloss surfaces. This step ensures better paint adhesion and enhances the final result. |
Remember, professional painters have refined their techniques through extensive hands-on experience. By following their advice and incorporating their tips into your own gloss cabinet painting process, you can elevate the quality of your results and achieve a truly exceptional finish.
Next, we’ll delve into the conclusion of our guide, where we’ll recap the key takeaways and encourage you to embark on your own gloss cabinet painting journey. Stay tuned!
Conclusion
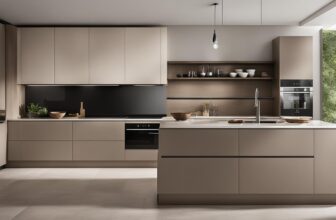
By following our expert tips and techniques, you can confidently paint your gloss kitchen cabinets and achieve a stunning makeover. The transformative power of painting your cabinets allows you to breathe new life into your space, creating a fresh and modern look. Whether you prefer a bold color to make a statement or a neutral tone for a timeless appeal, our detailed step-by-step guide will ensure you achieve professional results.
With the right preparation and the best paint for gloss cabinets, you can easily revamp your kitchen without the need for a costly renovation. Take the time to clean, sand, and prime your cabinets to ensure optimal adhesion and a long-lasting finish. Remember to gather all the necessary tools and materials before you begin, making the painting process smooth and efficient.
Once you’ve completed your gloss cabinet painting project, you can admire the beauty of your refreshed cabinets for years to come. Maintain their stunning appearance by cleaning and caring for them properly. From avoiding common painting issues to adding stylish finishing touches, we’ve provided you with the expert advice and techniques needed to achieve exceptional results. So go ahead, showcase your creativity and enjoy the satisfaction of a beautifully transformed kitchen space!