Easy Fix for Blown Kitchen Doors – DIY Guide
Welcome to our DIY guide on how to repair blown kitchen doors. If your kitchen doors are swollen, warped, or damaged, don’t worry – we’ve got you covered. In this comprehensive guide, we will walk you through the step-by-step process of fixing your blown kitchen doors, saving you time and money on professional repairs.
Blown kitchen doors are a common issue that many homeowners face. They can occur due to changes in temperature, humidity, or poor quality materials. Recognizing the signs of blown doors and knowing how to repair them is essential to maintain the functionality and aesthetic appeal of your kitchen.
With our easy-to-follow instructions and tips, you’ll be able to assess the damage, gather the necessary tools, remove the damaged doors, treat and restore them, repair their structure and functionality, reinstall them, and implement preventative measures to avoid future damage.
Key Takeaways:
- Blown kitchen doors can occur due to temperature and humidity changes.
- Regular maintenance is crucial to prevent and address issues with kitchen doors.
- Assess the extent of the damage before starting the repair process.
- Gather the necessary tools and materials to ensure a successful repair.
- Follow our step-by-step guide to treat, restore, and repair your blown kitchen doors.
Understanding Blown Kitchen Doors
When it comes to maintaining your kitchen, one issue that may arise is blown kitchen doors. Understanding the cause of this problem and how to fix it is essential to ensure the longevity and functionality of your kitchen.
Blown kitchen doors occur when the wood or material used in their construction expands or contracts due to changes in temperature and humidity. This can lead to warping, swelling, or gaps between the door and the frame.
To identify if your kitchen doors are blown, there are certain signs to look out for. Examine the doors closely for any visible changes in shape or size, such as bulging, bending, or rubbing against the frame. You may also notice difficulty in opening or closing the doors smoothly.
Regular maintenance is key to preventing blown kitchen doors and minimizing the risk of future damage. By taking proactive measures, you can extend the lifespan of your kitchen doors and avoid costly repairs.
The importance of kitchen door maintenance
Proper maintenance of your kitchen doors not only prevents them from blowing but also preserves their aesthetic appeal and functional performance. Here are some reasons why kitchen door maintenance is crucial:
- Maintains structural integrity: Regular maintenance helps to keep the doors in proper alignment and prevents issues such as warping or misalignment.
- Preserves aesthetics: Well-maintained kitchen doors enhance the overall look of your kitchen, creating an inviting and visually appealing space.
- Ensures smooth operation: By keeping hinges, knobs, and hardware clean and lubricated, you can ensure that your kitchen doors open and close seamlessly.
- Prevents costly repairs: Taking care of minor issues promptly can help you avoid more significant damage that may require extensive repairs or even door replacement.
“Regular maintenance is like a protective shield for your kitchen doors. It not only prevents blown doors but also safeguards their beauty and functionality.”
Maintaining your kitchen doors should become part of your regular cleaning routine. Wiping them down with a damp cloth and mild detergent can help remove dirt and grime that may accumulate over time. It is also advisable to periodically check for any signs of damage and address them promptly.
By understanding the causes of blown kitchen doors and the importance of regular maintenance, you can take proactive steps to prevent this issue and ensure the longevity and functionality of your kitchen doors.
Assessing the Damage
Before you can begin repairing your swollen kitchen doors, it’s important to assess the extent of the damage. This will help you determine the best course of action and ensure that the repairs are effective in fixing the swelling and other signs of damage. Follow these step-by-step instructions to properly assess the damage:
- Inspect the Doors: Carefully examine the swollen kitchen doors for any visible signs of swelling, warping, or cracks. Pay close attention to the edges and corners where the damage is most likely to occur.
- Check for Sticking: Open and close the affected doors to see if they stick or rub against the frame. This can indicate swelling or misalignment issues caused by the damage.
- Measure the Swelling: Use a measuring tape or ruler to measure the extent of the swelling on the doors. Note down the measurements for reference during the repair process.
- Assess Structural Integrity: Evaluate the structural integrity of the doors by checking for loose hinges, cracked panels, or any other issues that may affect their functionality.
By thoroughly assessing the damage, you’ll have a better understanding of the repairs needed to fix your swollen kitchen doors. It will also help you determine if additional restoration techniques, such as sanding or resealing, are necessary to regain their original appearance and functionality.

“Assessing the damage is a crucial first step in repairing swollen kitchen doors. It allows you to identify the extent of the swelling and other signs of damage, helping you plan and execute the necessary repairs effectively.”
Gathering the Necessary Tools and Materials
When it comes to DIY kitchen door repairs, having the right tools and materials is essential. The right equipment will not only make the repair process easier but also ensure a long-lasting result. Here’s a list of the essential items you’ll need:
- Screwdrivers: A set of screwdrivers with both Phillips and flathead heads will come in handy for removing screws.
- Putty Knife: This will be useful for scraping off old paint, adhesive, or any other debris on the doors.
- Sandpaper: Different grits of sandpaper (coarse and fine) will assist in smoothing the surface before painting or refinishing.
- Wood Filler: Use wood filler to repair any cracks or holes in the doors.
- Paintbrushes or Rollers: Select high-quality brushes or rollers suitable for the type of paint or finish you’ll be using.
- Paint or Stain: Choose a paint color or wood stain that matches your kitchen’s aesthetics.
- Masking Tape: Use masking tape to protect areas you don’t want to paint or stain.
- Wood Glue: If any joints or parts of the doors have come loose, wood glue will come to the rescue.
- Safety Equipment: Don’t forget your safety goggles, gloves, and a dust mask to protect yourself during the repair process.
These are just the basic tools and materials you’ll need, but the exact requirements may vary depending on the extent of the damage and the specific repair method you choose. Check the instructions for your chosen repair technique to ensure you have everything you need.
When selecting tools and materials, it’s worth investing in quality products. This ensures the repair will last longer and gives a more professional finish. You can find these items at your local hardware store or home improvement centers.
Pro Tip: If you’re unsure about which products will work best for your kitchen door repair, don’t hesitate to consult the experts at the store. They can provide guidance based on your specific needs.
Removing the Damaged Kitchen Doors
When it comes to kitchen door refurbishment, the first step is removing the damaged doors from their frames. This process requires careful attention to ensure a smooth removal without causing any further damage. Follow these detailed instructions and precautions to safely remove your kitchen doors:
Gather the necessary tools:
- Flathead screwdriver
- Phillips screwdriver
- Hammer
- Pry bar
- Protective gloves
The removal process:
- Start by removing any trim or moldings around the door frame using a flathead screwdriver or pry bar. Be careful not to damage the surrounding wall or the frame itself.
- Next, locate the hinges that attach the door to the frame. Use a screwdriver to remove the screws securing the hinges. It’s helpful to have someone support the weight of the door to prevent it from falling.
- Once the hinges are removed, gently set the door aside. Be cautious of the door’s weight and size, as some doors can be heavy and bulky.
- If the door is still connected to the frame with pins or pivot brackets, carefully detach them using a hammer or pry bar. Take your time and avoid using excessive force to prevent any damage.
- With the door fully detached, inspect the frame for any remaining hardware or attachment points. Remove any screws, nails, or brackets that may be holding the frame in place.
- Finally, lift the frame away from the wall, ensuring a steady and controlled removal. It’s advisable to have another person assist you with this step, especially if the frame is large or heavy.
By following these instructions, you can safely remove the damaged kitchen doors without causing any additional harm. Proper removal sets the foundation for the restoration and repair process, allowing you to effectively refurbish your kitchen doors.
Now that the damaged doors are removed, it’s time to move on to the next step: treating and restoring the doors. The detailed process of restoring your blown kitchen doors will be covered in Section 6.
Treating and Restoring the Doors
When it comes to restoring your blown kitchen doors, there are several techniques that can bring them back to their original glory. From sanding to resealing, let’s explore the steps you need to take for a successful restoration.
Sanding
One of the most effective techniques for restoring blown kitchen doors is sanding. Begin by removing the doors from their frames and placing them on a sturdy work surface. Use a fine-grit sandpaper to gently sand away any rough or damaged areas. Be sure to sand in the direction of the wood grain to achieve a smooth finish.

Resealing
Once the doors are sanded, it’s important to reseal them to protect against future damage. Choose a high-quality wood sealer that is suitable for kitchen use. Apply the sealer evenly using a brush or roller, following the manufacturer’s instructions. Allow the sealer to dry completely before moving on to the next step.
Using Appropriate Products
Another key aspect of kitchen door restoration is using the right products for the job. Whether it’s filling in cracks and holes with wood putty or applying a fresh coat of paint, selecting the appropriate products will ensure a professional-looking result. Take the time to research and choose products that are specifically designed for restoring kitchen doors.
“Restoring your blown kitchen doors can give your kitchen a fresh, updated look while saving you the cost of replacement.”
Reattach Hardware and Reinstall
Before reinstalling the restored kitchen doors, make sure to reattach any hardware, such as handles or hinges. Double-check that everything is securely fastened and aligned properly. Once you are satisfied with the restoration and reinstallation, step back and admire your beautifully restored kitchen doors.
| Materials Needed | Tools Needed |
|---|---|
| – Fine-grit sandpaper | – Screwdriver |
| – Wood sealer | – Paintbrush or roller |
| – Wood putty or filler | – Level |
| – Paint or stain | – Measuring tape |
By following these kitchen door restoration techniques, you can bring new life to your blown doors without the need for expensive replacements. Remember to take your time, pay attention to detail, and enjoy the process of transforming your kitchen.
Repairing Structure and Functionality
When it comes to fixing blown kitchen doors, repairing their structural integrity and functionality is essential. In this section, we will guide you through the process of addressing common issues such as warping and loose hinges. By following our instructions, you’ll be able to restore your kitchen doors to their full functionality.
Addressing Warping
Warping is a common problem with blown kitchen doors, causing them to curve or twist. To fix this issue, you’ll need the following tools:
- Clamps
- Moisture meter
- Flat surface
- Sandpaper
Begin by placing your kitchen door on a flat surface, ensuring it is stable and level. Use clamps to hold it in place if needed. Then, use a moisture meter to determine the moisture content of the door. If it exceeds the recommended level, allow the door to dry in a well-ventilated area until the moisture content decreases.
Once the door is adequately dried, gently sand the warped areas to remove any imperfections. Take your time and be careful not to remove too much material. Once the surface is smooth, you can apply a sealant or varnish to protect the door and prevent future warping.
Fixing Loose Hinges
Another common issue with blown kitchen doors is loose hinges. Loose hinges can cause the door to sag or make it difficult to open and close properly. To fix loose hinges, follow these simple steps:
- Remove the door from its frame. You can refer to Section 5 for detailed instructions.
- Tighten the loose screws on the hinges using a screwdriver. If the screw holes are worn out, you may need to fill them with toothpicks or wooden dowels for a better grip.
- If the hinges themselves are damaged or worn, consider replacing them with new ones.
- Reattach the door to the frame, ensuring that it is properly aligned and swings smoothly.
With these steps, you can effectively repair loose hinges and restore the functionality of your blown kitchen doors.
By addressing warping and fixing loose hinges, you can repair the structure and functionality of your blown kitchen doors. Take the time to assess the damage and follow our instructions for a successful repair. Don’t let blown kitchen doors compromise the functionality and appearance of your kitchen — take action and restore them to their full glory!
Reinstalling the Repaired Kitchen Doors
Now that your blown kitchen doors have been expertly repaired, it’s time to reinstall them and restore the functionality and style of your kitchen. Follow these simple steps to ensure a smooth and successful reinstallation process.
Step 1: Prepare the Doorframes
Before reinstalling the repaired kitchen doors, carefully inspect the doorframes for any dirt, debris, or damage. Clean the frames thoroughly to ensure a clean and secure fit for the doors. Use a mild, non-abrasive cleaner and a soft cloth to remove any residue.
Step 2: Check the Alignment
Proper alignment is crucial for the smooth operation of your kitchen doors. Before installing them back into the frames, check if they are level and plumb. Use a carpenter’s level to ensure that the doors are perfectly straight and aligned with the surrounding cabinets.
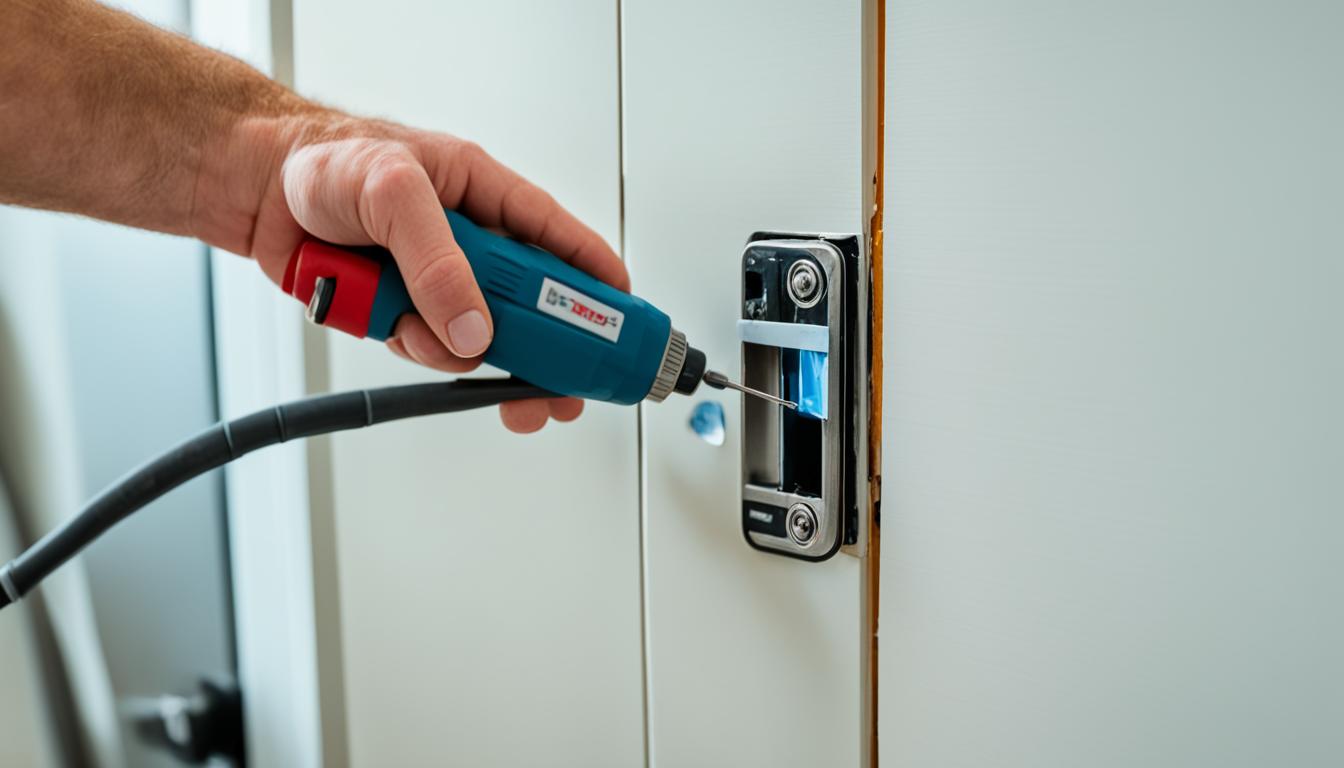
Step 3: Attach the Hinges
Next, attach the hinges to the doorframes. Make sure to align the hinges properly and securely fasten them using the appropriate screws. Double-check if the hinges are tight and the doors swing smoothly without any resistance.
Step 4: Test the Door Functionality
After attaching the hinges, test the functionality of the doors. Open and close them to ensure they operate smoothly and without any obstructions. Pay attention to any unusual sounds or movements and make adjustments as necessary.
Step 5: Final Adjustments
If needed, make final adjustments to the doors and hinges to achieve the perfect fit. Use a screwdriver to fine-tune the alignment and ensure that the doors close securely and create a tight seal with the frames. Take your time to achieve the desired results.
By following these steps, you’ll be able to reinstall your repaired kitchen doors with confidence and enjoy a fully functional and visually appealing kitchen once again.
If you need further assistance or encounter any difficulties during the installation process, don’t hesitate to consult a professional for expert guidance.
| Benefits of Reinstalling Kitchen Doors Correctly | Common Mistakes to Avoid |
|---|---|
|
|

Remember, the successful reinstallation of your repaired kitchen doors is crucial to maintaining their longevity and functionality. Take your time, follow the steps, and don’t hesitate to seek professional help if needed. With a little effort and attention to detail, your kitchen will be back in top shape in no time.
Maintenance and Preventive Measures
Proper maintenance is key to prolonging the lifespan of your kitchen doors and preventing future damage. By following these simple tips, you can ensure that your kitchen doors stay in top condition:
- Regular cleaning: Keep your kitchen doors clean by wiping them down with a damp cloth regularly. This will help remove dirt, grime, and any potential stains that can accumulate over time.
- Sealing: Check the seals around your kitchen doors periodically to ensure they are intact and effective. If you notice any gaps or damage, consider resealing them to prevent moisture or air infiltration.
- Inspecting for wear and tear: Regularly inspect your kitchen doors for signs of wear and tear, such as loose hinges, damaged handles, or warping. Address these issues promptly to avoid further damage.
- Maintaining proper ventilation: Adequate ventilation in your kitchen is crucial for preventing excess moisture buildup, which can lead to damage to your kitchen doors. Ensure that your kitchen has proper ventilation, such as exhaust fans or windows, to mitigate this risk.
- Avoiding excessive force: Be mindful of how you handle your kitchen doors and avoid slamming or forcefully closing them. Excessive force can damage the hinges, frames, or other components.
- Implementing preventive measures: Consider using door stoppers to prevent your kitchen doors from swinging open too forcefully, especially in areas with high foot traffic or strong drafts.
Expert Tip: Weather sealing
“Applying weather stripping to your kitchen doors is an effective way to enhance their insulation and protect them from the elements. This additional barrier helps prevent air leakage and minimizes the risk of swelling or warping due to temperature or humidity changes.” – Sarah Johnson, Home Improvement Expert

| Problem | Solution |
|---|---|
| Loose hinges | Tighten the screws or replace the hinges if necessary. |
| Warping | Sand down the affected area and reseal the door for stability. |
| Stains or marks | Gently scrub the surface with a mild cleaning solution or specialized stain remover. |
| Damaged handles | Replace the handles with new ones that match the style and design of your kitchen. |
By incorporating these maintenance habits into your routine, you can keep your kitchen doors looking and functioning their best for years to come.
Conclusion
Repairing blown kitchen doors doesn’t have to be a daunting task. By following our DIY guide, you can easily restore the functionality and aesthetics of your kitchen doors without the need for expensive professional help. Remember, regular maintenance is key to preventing future damage and prolonging the lifespan of your doors.
Throughout this guide, we have highlighted the importance of assessing the damage, gathering the necessary tools and materials, treating and restoring the doors, addressing structural issues, reinstalling the repaired doors, and implementing preventive measures. By carefully following these steps, you can repair your blown kitchen doors effectively and efficiently.
We hope this guide has been helpful in empowering you to take on this repair project with confidence. With a little time and effort, you can save both money and frustration by restoring your kitchen doors on your own. Remember, always prioritize safety and follow the instructions provided. You’ll soon have fully functional and visually appealing doors, ready to enhance the beauty and functionality of your kitchen.